
Built on Chrome's v8 engine, Node.js is a cross-platform Javascript Runtime built to execute Javascript code on the server-side. Node.Js transformed Javascript into a full-stack technology, thus making it ideal in web development as developers can use it to develop front and back-end applications. It provides numerous development tools to help developers seamlessly develop their applications.
As a back-end development environment, It's essentially ideal for developing backend applications and API services as well as fast and scalable network applications.
In this guide, we learn how to install Node.js on Ubuntu 22.04 LTS.
Prerequisites
To install Node.js on Ubuntu 22.04, ensure you have the following requirements in place.
- An instance of Ubuntu 22.04 with SSH access
- A regular user with sudo privileges
There are three ways that you can use to install Node.js on the command line.
- You can use the APT package manager to install the nodejs package from Ubuntu’s default software repository.
- Also, you can install nodejs from the Nodesource PPA which allows you to install specific versions of the nodejs package.
- Alternatively, you can install nvm ( Node Version Manager ) and use it to install and manage multiple versions of Node.js.
Method 1: Install Node.js and npm from official Ubuntu repositories
The easiest and most straightforward way of installing Node.js is using the APT package manager. However, take note that the version provided by Ubuntu's repository is not the latest release of Node.js. Therefore, the installed version will not be the most recent version of Node.js.
At the time of writing this guide, the default Node.js version that is currently hosted in Ubuntu repositories is 12.22.9. This should be stable enough for familiarizing yourself with the language.
To get started, first, refresh the repositories.
sudo apt updateNext, use the APT package manager to install Node.js on ubuntu. This installed Node.js and other new packages that will be required by Node.js.
sudo apt install nodejsOnce the installation of nodeJS is complete, you can confirm the installed version of Node.js using the command:
nodejs -vOutput
v12.22.9
Usually, you will also need to install npm ( Node Package manager ). This is a package management tool for NodeJS. It provides all the modules needed and intelligently handles dependency conflicts.
To install npm, run the following command.
sudo apt install npmSo far, we have installed Node.js and npm from Ubuntu repositories. Let us explore an alternative option of installing them.
Method 2: Install NodeJS from the Nodesource PPA repository
Another way of installing Node.js is by using the NodeSource PPA (personal package archive). NodeSource is a premier vendor for organizations that rely on Node.js for developing applications. It provides enterprise-grade support for organizations running production-ready Node.js applications with emphasis on application performance, security and resource utilization.
Nodesource provides multiple Node.js versions. At the time of writing, NodeSource provides the latest version Node.js which is Node.js version 16.x LTS. LTS is the most recommended version for most users.
To install nodejs from NodeSource, switch to the home directory.
cd ~Ensure you have curl installed which will be used to download and install the installation script for NodeSource. If curl is not installed, install it as follows.
sudo apt install curlOnce installed, run the following curl command as a regular user ( not root user ) to download and execute the NodeSource installation script.
curl -sL https://deb.nodesource.com/setup_16.x | sudo -E bash -The script adds the signing key, creates an apt repository file, installs all the requisites packages, and finally refreshes the local package index.
Now install nodejs on Ubuntu as follows:
sudo apt install nodejsThen verify the version of Node and NPM installed.
Output
v16.15.0
For npm run the following command.
npm --versionOutput
8.5.5
Method 3: Install Node.js using the NVM script
NVM, short for Node Version Manager, is a handy bash script that allows users to install and manage multiple versions of Node. JS. You can install and uninstall different versions of Node.js in a convenient way.
So, first, head over to the NVM Github page and download the script using either curl or wget command. Here I am using the curl command.
curl -o- https://raw.githubusercontent.com/nvm-sh/nvm/v0.39.1/install.sh | bashThe command clones the NVM repository to the ~/.nvm directory.
Output
=> Close and reopen your terminal to start using nvm or run the following to use it now:

export NVM_DIR="$HOME/.nvm"
[ -s "$NVM_DIR/nvm.sh" ] && \. "$NVM_DIR/nvm.sh"  # This loads nvm
[ -s "$NVM_DIR/bash_completion" ] && \. "$NVM_DIR/bash_completion"  # This loads nvm bash_completion
As the output suggests, close and reopen the terminal to start using nvm or manually add the nvm script to PATH.
With that done, now check if nvm was successfully installed as shown.
nvm --versionOutput
0.39.1
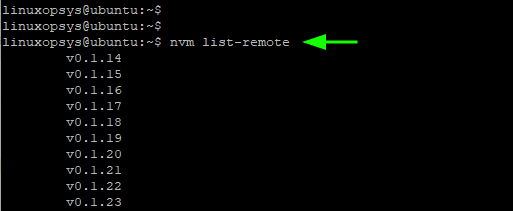
To list all the available versions of Node.js that can be installed using the nvm method, run the command:
nvm list-remoteThis populates a long list of all the node versions including LTS releases.
To install the latest release of Node.js, run the command:
nvm install nodeOutput
Downloading and installing node v18.1.0...
Downloading https://nodejs.org/dist/v18.1.0/node-v18.1.0-linux-x64.tar.xz...
#################################### 100.0%
Computing checksum with sha256sum
Checksums matched!
Now using node v18.1.0 (npm v8.8.0)
Creating default alias: default -> node (-> v18.1.0)
Once installed, confirm the version of Node.js installed.
node --versionOutput
v18.1.0
To install the latest LTS release, run the command:
nvm install --ltsOutput
Installing latest LTS version.
Downloading and installing node v16.15.0...
Downloading https://nodejs.org/dist/v16.15.0/node-v16.15.0-linux-x64.tar.xz...
################################################ 100.0%
Computing checksum with sha256sum
Checksums matched!
Now using node v16.15.0 (npm v8.5.5)
The above output shows that the installation was a success. Once installed, you can print out the node version as follows:
node --versionOutput
v16.15.0
Still, you can install a specific version of node with nvm by specifying the version number. For example, let us install Node version 14.19.1.
nvm install 14.19.1Output
Downloading and installing node v14.19.1...
Downloading https://nodejs.org/dist/v14.19.1/node-v14.19.1-linux-x64.tar.xz...
############################################ 100.0%
Computing checksum with sha256sum
Checksums matched!
Now using node v14.19.1 (npm v8.5.5)
To list all installed versions of Node.js, run the command:
nvm ls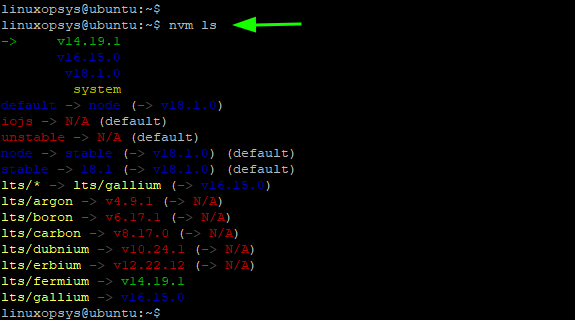
The first entry that is preceded by an arrow ( -> v14.19.1 ) is the Node.js version used in the current shell session. while the default version is set to v18.1.0. The default version is the version that will remain active upon opening a new shell.
To change the current version of node, for instance to version 16.1.5.0, run the command:
nvm use 16.15.0Output
Now using node v16.15.0 (npm v8.5.5)
Conclusion
This sums up our guide on how to install Node.js on Ubuntu 22.04. We have seen various ways of installing it on the Ubuntu operating system. You can choose any installation method depending on what your development environment demands.


Comments