
When it comes to making HTTP requests, the curl command stands out as a versatile and indispensable tool. Whether you’re fetching data from a remote server, interacting with APIs, or debugging network issues, curl provides a comprehensive set of features to simplify these tasks.
Through this guide, we’ll take a look into the core concepts of utilizing the curl command within the Linux environment with examples.
Installing Curl on Linux Distributions
The curl package comes preinstalled in most Linux Distributions. However, if it’s not installed you can easily install using the package manager of your Linux Distribution. Remember to update the package list before installing new software to make sure you get the latest version.
Ubuntu and Debian:
sudo apt install curlCentOS Stream/RHEL:
sudo yum install curlFedora:
sudo dnf install curlArch Linux:
sudo pacman -Sy curlOnce installed you can verify the installation with the curl --version command from the terminal.
Basic Curl Syntax
The basic syntax of curl is as follows:
curl [options] [URL]The options specify the behavior of curl command. It supports various options and we will cover some of the useful among them.
The URL specifies the target from/to which the data is transferred.
Basic Curl Commands
Let's check into some of the common curl command operations:
Download a URLs Content:
You can simply provide the URL followed by the curl command to fetch the HTML contents of a website.
curl https://jsonplaceholder.typicode.com/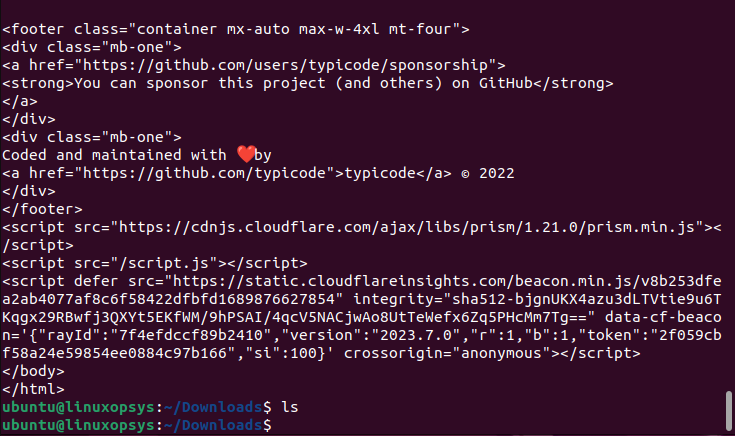
This command sends a GET request to https://jsonplaceholder.typicode.com/ and outputs the HTML content to the terminal.
Saving Output to a File:
Instead, if you want to download the content you can use -o or -O option. The -o allows you to specify the name of the file and its location whereas the -O option downloads by saving it with the same name that it has on the remote server.
Example:
curl -O https://jsonplaceholder.typicode.com/posts/posts1.zip
This command downloads posts1.zip from the remote server to your current directory with the same name as posts1.zip.
Whereas to download the file and save it with a specified filename
curl -o mypost.zip https://jsonplaceholder.typicode.com/posts/posts1.zip
This command downloads posts1.zip from the remote server to your current directory and save it to a file named mypost.zip
Note: If the server has redirection the curl by default won’t follow the redirect by simply saying the report page has moved. Instead, it is recommended to use -L option to tell curl to make a new request to the new location.
Common Usages with Examples
Let's look into some of the very common usages of curl command with examples.
HTTP Requests with Curl
Curl is a very handy tool when you want to make HTTP requests. Let's look into some examples of how to use curl to make different types of HTTP requests:
GET Request
The GET is the default HTTP type when curl does a request. A GET request simply retrieves data from a specified server.
Example:
curl http://jsonplaceholder.typicode.com/This command fetches the content of http://jsonplaceholder.typicode.com/ and outputs the HTML content to the terminal. APIs typically return data in JSON or XML format. You can pretty-print JSON responses using tools like jq.
POST Request
The POST is the opposite of GET request. Instead of retrieving this request, it sends ( or “posts”) data to a specified server.
curl -X POST http://jsonplaceholder.typicode.com/posts
This command will make a POST request to http://jsonplaceholder.typicode.com. Here the -X option is used to specify the method PUT and URL is the target location where to add the resource.
Generally the -X option is used with the -d and the -H options. -d option tells curl to send data that follows in the request body and -H option specifies the content type ( for example json). One real-world example where this can be applied is to submit a form on a webpage.
PUT Request
The HTTP PUT method or request is used to update the data on a server. We saw the POST method is used to create new resources, whereas PUT will update specific resources.
Example:
curl -X PUT http://jsonplaceholder.typicode.com/posts/1 -d "id=11"
This command will make a PUT request to http://jsonplaceholder.typicode.com with the data in the request body. This will update the data “11” at the specified URL with the new values.
DELETE REQUEST
You can use HTTP DELETE method to delete a specific resource on a server. Generally, not all API allow DELETE method or else require authentication to perform such tasks.
curl -X DELETE http://jsonplaceholder.typicode.com/posts/1
This will make a DELETE request to http://example.com/data/123. This will delete the data available at that URL. When performing the DELETE request, we generally don’t include a body as it's just to remove that resource.
PATCH REQUEST
A PATCH request is used to make a partial update to existing data on a server. Whereas the PUT method completely replaces the existing resources.. The PATCH comes useful if the resource has many attributes and needs to change only a few.
curl -X PATCH http://jsonplaceholder.typicode.com/posts/1 -d "title=testing"
This will make a PATCH request to http://jsonplaceholder.typicode.com/posts/1. The data title=testing is passed with the -d flag. This will update the specified resource with the new value of the "title" field.
HTTP Data
In our previous section we saw how to send data over the HTTP request. Here, we will understand in more detail. The curl command uses -d or --data option to send data in the body of an HTTP request. This is generally used with POST, PUT and PATCH methods.
Using Post Request to send data:
The following example specifies data to be sent in the request body:
curl -X POST http://jsonplaceholder.typicode.com/post -d "userId=1&title=foo&body=bar"
This command makes a POST request to the placeholder service and it will return a JSON object confirming the receipt of the data.
However, if the service expects JSON data (which is common for many RESTful APIs), you'd need to modify the curl command a bit:
curl -X POST http://jsonplaceholder.typicode.com/posts -H "Content-Type: application/json" -d ‘{“userId”:”1”,”title”:”foo”,”body”:”bar”}’
Here we added -H "Content-Type: application/json" to specify that we're sending JSON data.
It is also possible to send data from a file. If your data is stored in a file, you can use the @ symbol to read from it. Let's look into an example:
curl -X POST http://jsonplaceholder.typicode.com/posts -H "Content-Type: application/json" -d "@data.json"
Here we used a JSON file named “data.json” instead of inputting our JSON data directly into the terminal.
Remember you can use -d option with other HTTP methods such as PUT, DELETE, PATCH, etc. Also based on your requirements you can combine with other options such as -c (to save cookies), -b (to send cookies), etc.
HTTP Headers
HTTP headers play a cruical role in transferring metadata between clients and servers during HTTP transactions. The curl command allows you to both view and set HTTP headers.
Retrieving HTTP Headers:
Use -I option to retrieve only the HTTP headers from the specified source URL. Example:
curl -I http://jsonplaceholder.typicode.com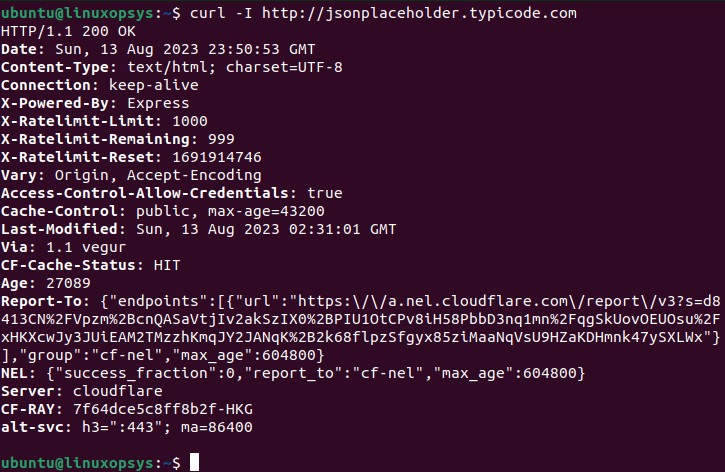
This command fetch the HTTP headers from http://jsonplaceholder.typicode.com and display them on the terminal.
Instead, you can use -i retrieve headers with content. The headers will display before the actual content.
Sending Custom HTTP Headers:
You can use -H option to set your own custom headers. The custom headers can be Content-Type, User-Agent, Referer, etc.
Example:
curl -H "Content-type: application/json; charset=UTF-8" http://jsonplaceholder.typicode.com/posts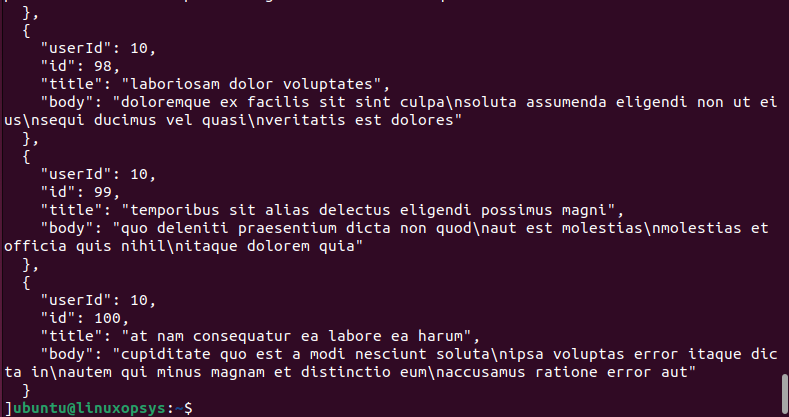
This command set the Content-Type header to application/json which tells the server that we're sending or expecting JSON data.
Let's look into another example to set 'User-Agent' header to match a string of a Mozilla browser.
curl -H "User-Agent: Mozilla/5.0 (Windows NT 10.0; Win64; x64; rv:89.0) Gecko/20100101 Firefox/89.0" http://example-url.comThis command uses the -H option to set the User-Agent string to that of Mozilla Firefox:
Tip: To save the headers to a file you can use -D option - for example curl -D webheaders.txt http://example-url.com.
File Upload
The HTTP POST is the common method to upload files to a server. For that use -F option that tells curl that the following data is being sent as multipart/form-data encoding.
Uploading and downloading files over HTTP is a common task. With curl we can accomplish both tasks easily. To upload a file, we can use the -F option.
Example:
curl -X POST -F "[email protected]" http://jsonplaceholder.typicode.com
In the command @ symbol tells curl to upload file provide in the path.
You may also send additional form data using the multiple -F option along with file upload. For example:
curl -X POST -F "[email protected]" -F "username=bob" http://jsonplaceholder.typicode.comUsing Curl with Proxies
When it comes to working with networks that require a proxy server, curl offers a simple solution using the -x option.
Example:
curl -x http(s)://proxy_address:port http(s)://targetwebsite.com/To route requests through the proxy server replace proxy_address with the IP or hostname of your proxy server and port with the proxy's port number.
If your proxy needs authentication then use -U option to add a username and password. Example:
curl -x http(s)://proxy_address:port -U username:password http(s)://targetwebsite.com/You may also use environment variables for specific proxy details. This comes useful if you route all traffic using one proxy or specify proxies for different protocols.
export http_proxy=http://proxy_address_http:port
export ftp_proxy=http://proxy_address_ftp:port

curl http://example.com
curl ftp://example-ftp.com
Cookies
When interacting with websites or APIs that require sessions or authentication, cookies play a crucial role in maintaining continuity and session state between multiple HTTP requests. You can use the curl command to save cookies from a response and send cookies with a request.
Use -c or --cookie-jar option to save cookies returned by a web server. Example:
curl -c cookies.txt https://stackoverflow.com/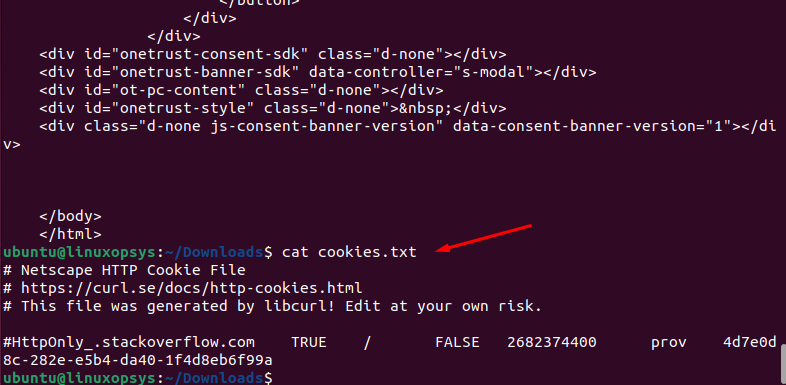
This command saves cookies to the cookies.txt file set by https://stackoverflow.com/ during the request. You may combine -j or --junk-session-cookies option tell curl to discard the session cookies.
And to send (or read from a file) cookies to a website server use -b or --cookie option. Example:
curl -b cookies.txt http://jsonplaceholder.typicode.com/Tip: Sometimes it comes useful to see the Set-Cookie headers in the response, use -I option.
Debugging with Curl
Curl provides a range of options when troubleshooting connectivity or service issues. Let's check how to use curl for debugging.
Verbose Output:
The -v or --verbose mode give more detailed information about the connection, request and response.
The output contains:
- Information about SSL handshake, certificates, and protocols.
- Headers send by curl and received from the server.
- Body of the response.
- Connection details include DNS, TCP, TLS handshake etc.
- The symbols indicate * general information, > data sent to the server and < data received from the server.
Example:
curl -v http://jsonplaceholder.typicode.com/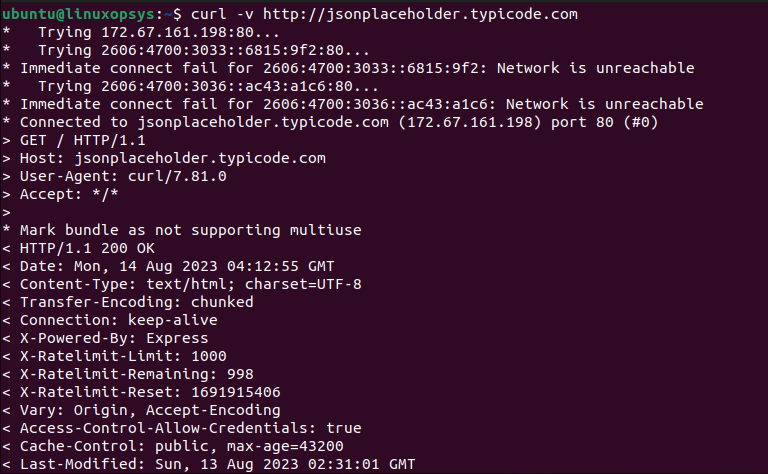
Here curl creates a connection to the website http://jsonplaceholder.typicode.com/ and sends a GET request, after which the website responds back with a "200 OK" code alongside its contents.
Full dump:
For a detailed analysis it's required to perform a full trace using --trace with curl. This will give a byte-by-byte log of the entire transaction, suitable for deep analysis and saved to a file.
Example:
curl --trace trace-output https://kernel.org/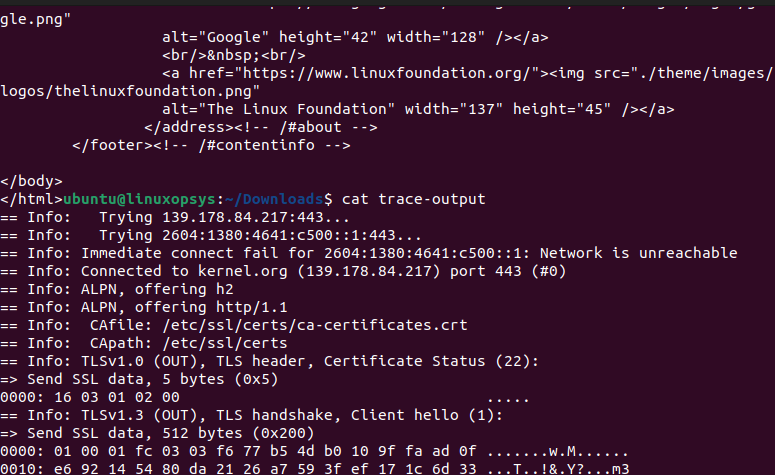
curl -o /dev/null -s -w "%{http_code}\n" http://jsonplaceholder.typicode.com/Get HTTP status code:
To just get the HTTP status code using curl command we can use -o, -s and -w options combined. Example
curl -o /dev/null -s -w "%{http_code}\n" https://kernel.org
Here -o /dev/null used to discard the body of the HTTP response to /dev/null, -s option tells curl not to show usual status, errors, etc, -w allows us to write output using the available variables ( here we used %{http_code}).
The output 200 indicates a successful HTTP GET request to the website.
Troubleshooting SSL:
Curl provides a set of options and features to troubleshoot SSL-related issues. Let's check into a few of them.
To get the SSL certificate expiration date for a website, type:
curl https://linuxopsys.com -vI --stderr - | grep "expire date"
Sometimes you need to tell curl to skip certificate validation for testing purposes or a website that doesn't have a valid SSL certificate. For this we can use -k option:
curl -k https://example.comOften, companies have internal servers with certificates signed by a private CA (not trusted by the public). When accessing these servers, you'd need the --cacert option with the company's CA certificate. Let's check curl command to verify client can trust the certificate on the server via TLS request:
curl --cert client.crt --key client.key --cacert ca.crt https://internalserver.int.min:443

Comments