
In most network setups, network devices automatically acquire IP addresses from a DHCP ( dynamic host configuration protocol) server which, in most cases, is a router. The router contains a 'pool' of IP addresses that are ready to be leased out. The DHCP client sends an IP request to the router and the router, in turn, assigns a unique IP to each device. In doing so, this avoids an IP conflict.
However, there are a few scenarios that may require you to configure a static IP address. For example, you might want to configure your system to act as a web server or gaming server. This demands that the IP configuration remains unchanged, or else users will not access the server.
In this guide, we learn how to configure a static IP address on Ubuntu 22.04.
Configure Static IP Address on Ubuntu Server
Unlike Ubuntu Desktop, the Ubuntu server does not provide a graphical interface to allow users to make any settings. As such, we are going to make use of the command-line interface to configure a static IP address.
In Ubuntu 22.04, network configuration is handled by the netplan utility. This is the network configuration management tool for modern releases of Ubuntu and was introduced in Ubuntu 17.10. Older releases were using the ifconfig tool and the /etc/network/interfaces file for network configuration.
Netplan configuration files exist in YAML format with a .yaml file extension as we shall see shortly. But first, check the available network interfaces in our system.
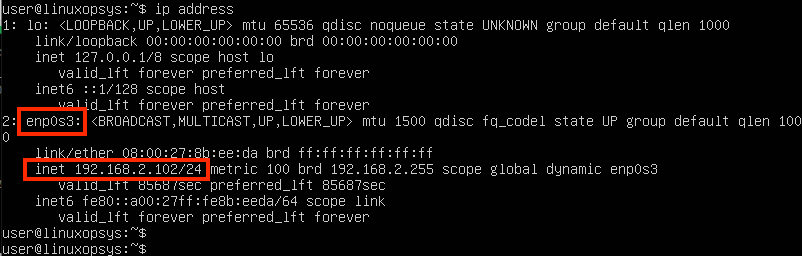
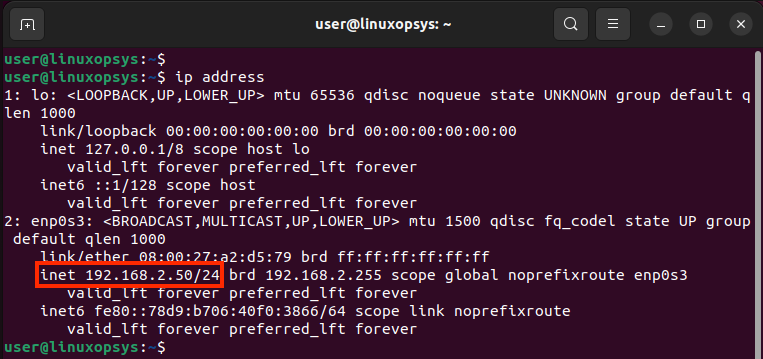
To do so, run the following IP command:
ip addrOrip address
In most systems, IP assignment is automatically handled by a DHCP server. This is the preferred IP assignment method as it averts possible IP conflict cases in a network.
The output below shows the present interfaces on our system. We have the lo interface which is the loopback address and enp0s3 which is the active network interface with the IP 192.168.2.102/24.
We will configure a static ip using the netplan configuration tool. Netplan yaml files are contained in the /etc/netplan directory. In Ubuntu 22.04 server, we need to modify the /etc/netplan/00-installer-config.yaml netplan yaml file.
But before we do so, we need to ensure that cloud-init is not managing the network interface. To achieve this, open the /etc/cloud/cloud.cfg.d/subiquity-disable-cloudinit-networking.cfg file.
sudo nano /etc/cloud/cloud.cfg.d/subiquity-disable-cloudinit-networking.cfgEnsure that the “network: {config: disabled}” entry exists as shown.
Output
network: {config: disabled}
Next, take a backup of the netplan configuration file before modifying it.
sudo cp -a /etc/netplan/00-installer-config.yaml{,.orig}Now, open the netplan configuration file using the following command.
sudo nano /etc/netplan/00-installer-config.yamlThis is what our YAML configuration file looks like:
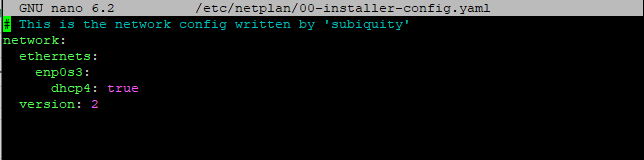
From the configuration file, you can see that the system is configured to use DHCP for IP address configuration. Now, we are going to set the static ip address of 192.168.2.80 with 8.8.8.8 and 192.168.2.1 as the DNS servers and 192.168.2.1 as the default gateway address.
So, set the 'dhcp' attribute to 'no', and paste the following ip configuration. Be sure to adjust the IP details according to your network subnet.
network:
ethernets:
    enp0s3:
      dhcp4: no
      addresses: [192.168.2.80/24]
      nameservers:
        addresses: [8.8.8.8, 192.168.2.1]
      routes:
         - to: default
           via: 192.168.2.1
  version: 2
Once done save the changes made to the configuration file and apply the changes using the following netplan command.
sudo netplan applyIf you are connected to the server via SSH, your connection will close due to the change of the server's IP address. To access the server, start a new SSH session and confirm that your ethernet interface has acquired the new static ip address.
ip address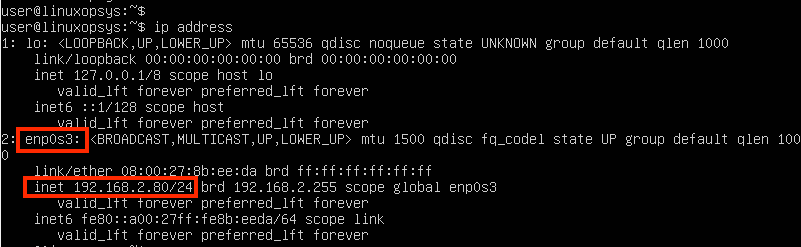
The above output is a confirmation that the static ip address was successfully configured.
Configure static IP address using GUI on Ubuntu Desktop
If your Ubuntu system is a desktop version, then you can easily configure a static ip address using the graphical interface instead of the command-line interface.
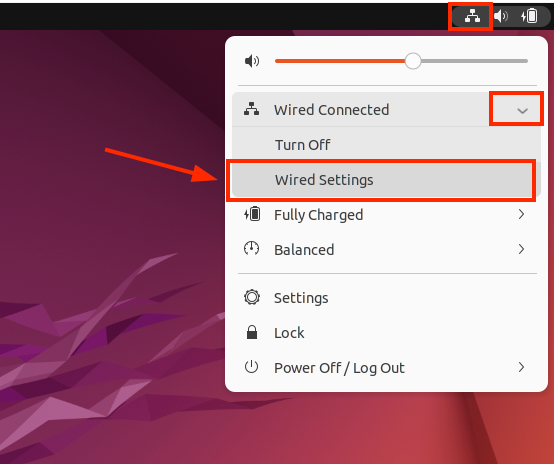
To configure a static IP address on Ubuntu desktop, click on the network icon in the top right corner. A drop-down menu appears. Next, click on the arrow down icon on 'Wired Connected' to expand the menu and select 'Wired Settings'.
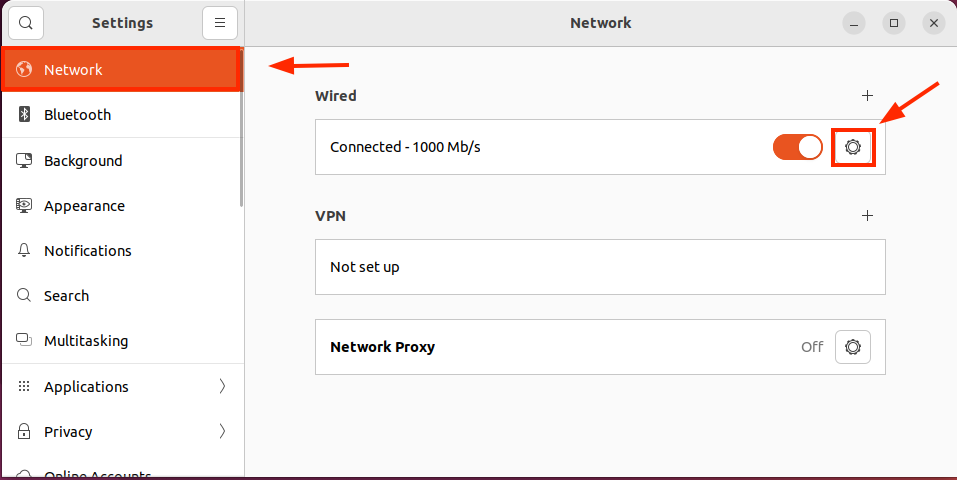
On the 'Network' window as shown. Next, click on the gear icon in the 'Wired' section as indicated.
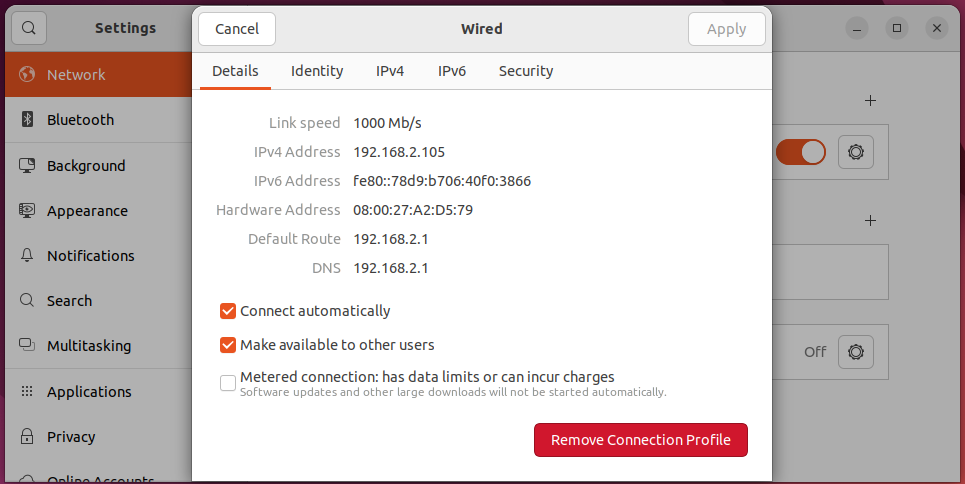
The new window provides you with your current IP configuration for your active network interface. As mentioned earlier, the network settings are usually dynamically assigned by a DHCP server.
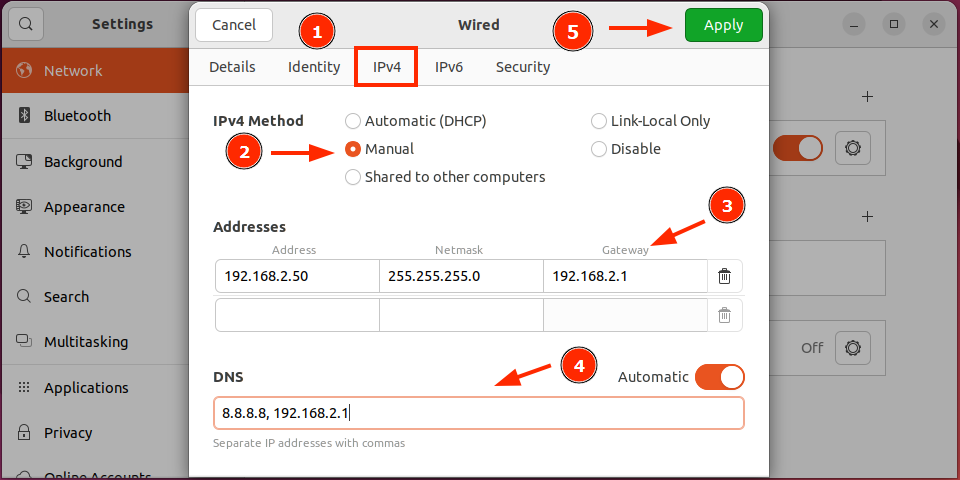
To configure a static ip address, click on the 'IPv4' tab. Next, click on the 'manual' radio button. Then fill out the static ip address, netmask, default gateway, and DNS details as indicated. Then press 'Apply' to save the configuration.
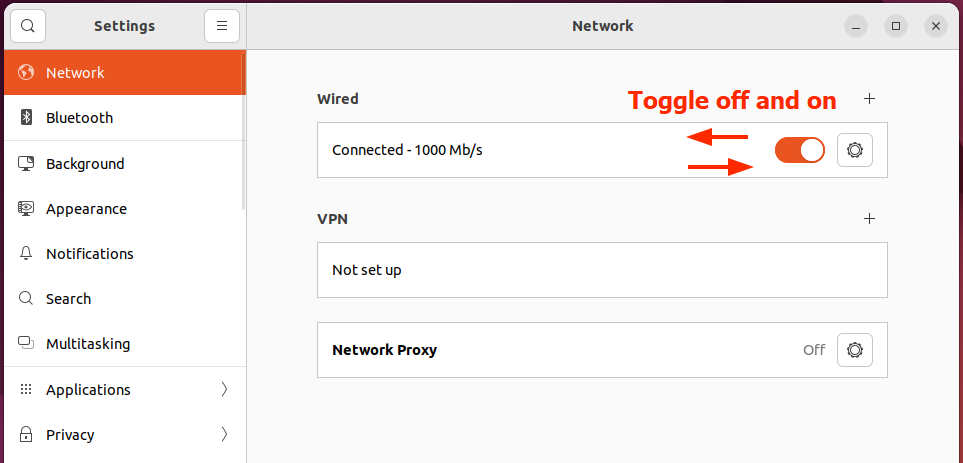
Back to the 'Network' window. Be sure to toggle off and on to restart the networking service or network manager in order to apply the changes made.
To confirm the ip configuration, you can launch the terminal and run the command:
ip addressFrom the output, you can see that the IP address has changed to reflect the static ip address that we configured. The enp0s3 is the network interface name.
Conclusion
We have successfully configured a static IP address on Ubuntu Server 22.04 and Ubuntu desktop.
Thanks for reading, please leave your feedback and suggestions in the comment section below.


Comments