
Arduino IDE is an open-source application to write and upload code to Arduino compatible boards. It is a cross-platform application that works on Windows, macOS, and Linux. Arduino is a hardware programming language, basically written in C and C++.
This tutorial will show you how to install Arduino IDE on Ubuntu 20.04. There are three different ways to install Arduino on Ubuntu - using the official installer script, using the snap package, and apt.
Installing Arduino IDE using script
This is the easiest and most recommended way to install Arduino IDE on Ubuntu.
Step 1: Make sure your Ubuntu system packages are up-to-date:
$ sudo apt update
$ sudo apt upgrade
Step 2: Download Arduino IDE and extract
Download the latest version of the Arduino IDE for Linux 64bit from the download page. It is very important that you choose the right version for your Linux distro, which in our case is Ubuntu Linux 64bit.
The following commands download the Arduino IDE version 1.8.15 tar.xz file to a temporary directory named 'arduino':
$ mkdir arduino
$ cd arduino/
$ wget https://downloads.arduino.cc/arduino-1.8.15-linux64.tar.xz
Step 3: Extract the tar.xz file:
$ tar -xvf ./arduino-1.8.15-linux64.tar.xzStep 4: Install Arduino using the installer script
Change the directory, then run the installed script:
$ cd arduino-1.8.15/
$ sudo ./install.sh
By default Arduino is installed to /usr/local/bin/arduino.
You should find a new icon on your desktop and application list:
Adding user to dialout group
To avoid any possible problems when using Arduino IDE, add your system user to the dialout group.
This is the procedure to access the serial port from the Arduino Software (IDE) if you get an error.
It might happen that when you upload a sketch you get the following error:
"Error opening serial port ..."
If you get this error, you need to set serial port permissions.
Type the following command in the terminal:
$ ls -l /dev/ttyACM*
you will get something like:
crw-rw---- 1 root dialout 188, 0 5 apr 23.01 ttyACM0The data we need is "dialout" (it is the group owner of the file).
Now we just need to add our system user to the group:
$ sudo usermod -a -G dialout <username>
where <username> is your Linux user name. You will need to log out and in again for this to take effect.
In my case it is:
$ sudo usermod -a -G dialout user1After this command, you should be able to run an IDE normally and upload the sketch to your board or use the Serial Monitor.
Running the Arduino IDE first time
Before launching the IDE, connect your Arduino board to your computer with a USB cable.
Arduino should be available in the Application list - if not, it can be launched from the command line by running arduino.
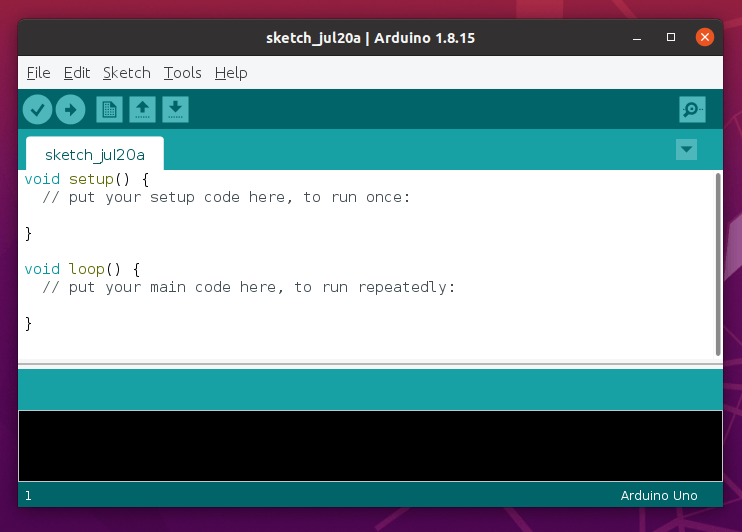
If everything was installed and set up correctly, we should see the IDE’s main editor window.
Installing Arduino IDE using Snap
Arduino IDE is also available from Snap packages. We can install it using the following command:
$ sudo snap install arduinoOutput:
arduino 1.8.15 from Merlijn Sebrechts installedThe package is the latest Arduino IDE version.
Install Arduino IDE using Apt
The repository may take some time to get the latest version. So it's good to check the version available before installing.
$ sudo apt search arduinoOutput:
arduino/focal,focal 2:1.0.5+dfsg2-4.1 all
AVR development board IDE and built-in libraries
Arduino IDE is available in Ubuntu repositories, you can install it using the apt.
$ sudo apt-get install arduino
Conclusion
In this tutorial, we learned how to install Arduino IDE on Ubuntu 20.04 LTS.
For additional help or useful information, we recommend you check the official Arduino website.


Comments