Android SDK consists of a collection of tools that help developers to create Android applications. It comes with tools such as Build Tools, Platform Tools, Emulator, Jetifier, and command line tools.
When you install Android Studio, the Android SDK comes along with it. Some developers may prefer to use their own preferred text editor or IDE and only need SDK tools for their development.
In this tutorial, we learn how to install Android SDK without android studio on a Ubuntu.
Prerequisites
- One Ubuntu system with a sudo non-root user.
- Java JDK 8 or above version installed.
Step 1. Setup Directory for Android SDK
First, create a directory structure to set up SDK Tool. In my case, going to place it in my home directory under ~/android/sdk directory.
For creating the directory, type:
mkdir -p ~/android/sdkStep 2. Download Android command-line tools
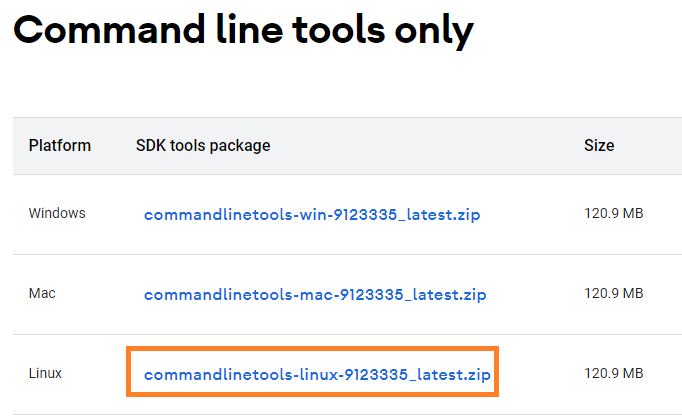
Visit the Android Studio download page and grab the link to download sdk command line tool. This would be at the bottom of the webpage in the section "Command line tools only" and contained in a zip file.
Note: This package is generic for all Linux Distributions. We have tested only on Ubuntu. Should work on other Linux Distros as well.
Change to the sdk directory created before:
cd ~/android/sdkDownload the zip file using wget command:
sudo wget https://dl.google.com/android/repository/commandlinetools-linux-9123335_latest.zipOnce downloaded, extract the .zip file using the unzip command:
sudo unzip commandlinetools-linux-9123335_latest.zipOnce extraction is completed, you will have a new directory named cmdline-tools. Now change to that directory.
cd cmdline-toolsLet's create a new directory inside cmdline-tools to hold all bin and lib contents.
mkdir toolsNow you can move everything inside the cmdline_tools directory to the tools directory.
mv -i * tools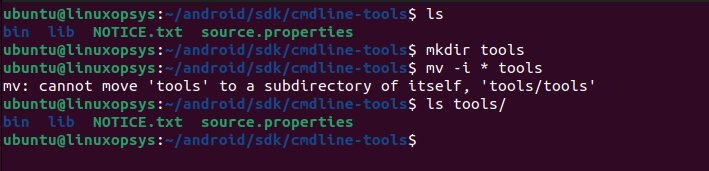
Step 3. Let the system know SDK Location
For the SDK command line tool to work, we have to set up environment variables properly. For this let us set the ANDROID_HOME environment variable and update the PATH variable.
export ANDROID_HOME=$HOME/android/sdk
export PATH=$ANDROID_HOME/cmdline-tools/tools/bin/:$PATH
export PATH=$ANDROID_HOME/emulator/:$PATH
export PATH=$ANDROID_HOME/platform-tools/:$PATH
To make the changes permanent, you would need to add these commands to your shell profile file (e.g. .bash_profile or .bashrc).
Step 4. Install Android SDKs from Command Line
The Android SDK command line tools package comes with sdkmanager command. This tool is used to manage the packages and components of the Android SDK. Commonly used to list, install and update packages.
To list all installed and available packages, type
sdkmanager --list
or
sdkmanager --list --channel=channel_id // Channels: 0 (stable), 1 (beta), 2 (dev), or 3 (canary)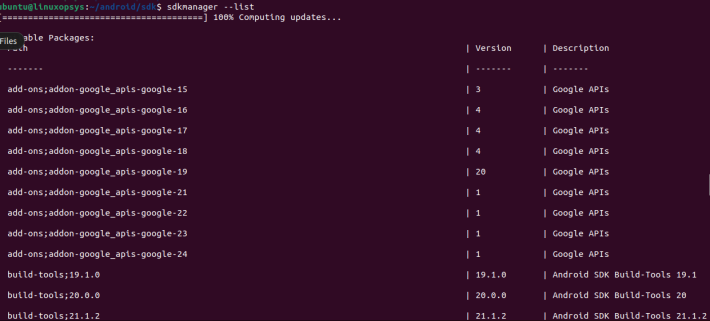
The output is a long list of packages. You can use filter the list using grep - for example sdkmanager --list | grep package-name.
To install packages use the following syntax:
sdkmanager --install packages [options]Some of the useful packages are platform tools, build tools, and emulator. To install those packages using sdkmanager, type:
sdkmanager --install "platform-tools" "build-tools;30.0.1" "emulator" "platforms:android-33"To keep all packages on the latest version update packages use sdkmanager --update command.
Conclusion
In this tutorial, we learned how to install Android SDK without actually installing the full android studio. This is more useful for guys who are more interested to stick on the command line.
Thanks for reading, if you encounter any issues please leave a comment.


About The Author
Bobbin Zachariah

Bobbin Zachariah is an experienced Linux engineer who has been supporting infrastructure for many companies. He specializes in Shell scripting, AWS Cloud, JavaScript, and Nodejs. He has qualified Master’s degree in computer science. He holds Red Hat Certified Engineer (RHCE) certification and RedHat Enable Sysadmin.
Can I use the sdkmanager –install command on my root directory or should I change to the cmdline-tools or cmdline-tools/tools directory to use sdkmanager –install?
Set environment variable to the path where the Android SDK is installed. This helps tools and scripts to locate your SDK.
$ flutter doctor -v
Please guide me on the above error.
1. ✗ Android license status unknown.
2. [!] Android Studio (not installed)
Is these 2 errors are important to resolve to build flutter apps?
Try this !!
sdkmanager –update
sdkmanager –install “cmdline-tools;latest”