
CUDA is a parallel computing platform and a programming model that provides a remarkable user experience when leveraging GPU for everyday general-purpose computing. CUDA stands for Compute Unified Device Architecture. It is created by NVIDIA.
CUDA comprises the CUDA toolkit ( compiler, profile, and debugger ), the software driver, and the CUDA SDK. The software layer gives direct access to the GPU's virtual instruction set and parallel computational elements. For deep learning researches and framework developers use cuDNN for high-performance GPU acceleration. It is a library of primitives for deep neural networks.
In this guide, we learn how to install CUDA and CuDNN on Ubuntu 20.04. There are two ways of going about this. You can install CUDA from Ubuntu Repository - which is the easiest approach - or install from the CUDA repository which provides the latest version of CUDA.
Prerequisites:
- Minimum 20 GB of free disk space
- Recommended 2 GB RAM
- Should have NVIDIA graphics driver installed. Driver that comes with CUDA may not be lastest version.
Method 1: Install CUDA from Ubuntu repository
Start off by updating the package lists on your Ubuntu 20.04 instance.
sudo apt updateNext, install the CUDA toolkit using the APT package manager as follows. Note that the installation is intensive, and as such ensure you have a fast and stable internet connection and a minimum of 10G of disk space.
sudo apt install nvidia-cuda-toolkitOnce the installation is complete, we need to add CUDA to PATH so as to notify the shell of the location of CUDA. To do this, we will specify the PATH in the .bashrc file. So, open the file using your command-line text editor.
sudo vim ~/.bashrcAt the very end of the file, copy and paste the following lines of code.
# set PATH for cuda 10.1 installation

if [ -d "/usr/local/cuda-10.1/bin/" ]; then

export PATH=/usr/local/cuda-10.1/bin${PATH:+:${PATH}}

export LD_LIBRARY_PATH=/usr/local/cuda-10.1/lib64${LD_LIBRARY_PATH:+:${LD_LIBRARY_PATH}}

fi
Next, reload the changes in the .bashrc file.
source ~/.bashrcNow check and confirm the version of CUDA installed using the following command.
nvcc --version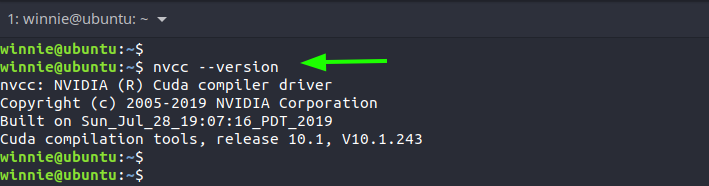
Method 2: Install CUDA from CUDA repository
As mentioned earlier, the CUDA repository provides the latest version of CUDA. So, if you are out to install the latest version, then follow the instructions outlined herein.
First, download the CUDA repository pin:
wget https://developer.download.nvidia.com/compute/cuda/repos/ubuntu2004/x86_64/cuda-ubuntu2004.pinNext, move the pin to the /etc/preferences.d directory and rename it as cuda-repository-pin-600.
sudo mv cuda-ubuntu2004.pin /etc/apt/preferences.d/cuda-repository-pin-600
Thereafter, download the CUDA Debian file. Be notified that the file is quite large - 2.3G to be precise at the time of writing this guide. Ensure you have a good internet connection and ample disk space.
wget https://developer.download.nvidia.com/compute/cuda/11.4.2/local_installers/cuda-repo-ubuntu2004-11-4-local_11.4.2-470.57.02-1_amd64.debOnce downloaded, use the dpkg utility to execute the file.
sudo dpkg -i cuda-repo-ubuntu2004-11-4-local_11.4.2-470.57.02-1_amd64.debNext, install the CUDA GPG key as follows:
sudo apt-key add /var/cuda-repo-ubuntu2004-11-4-local/7fa2af80.pubFinally, update the package lists and install CUDA using the APT package manager.
sudo apt updatesudo apt install cuda -yInstall CuDNN
CuDNN doesn't come with Cuda. To download CuDNN you need to register to become a member of the NVIDIA Developer Program which is free.
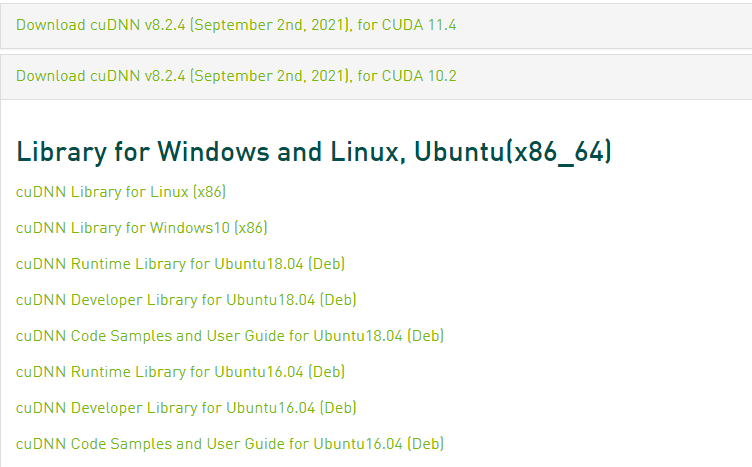
After registering in NVIDIA Developer Program you can download the latest version of cuDNN. Here I am downloading the cuDNN Library for Linux.
First, extract the cuDNN package:
tar -xzvf cudnn-10.2-linux-x64-v8.2.4.15.tgzThen copy the following files to the CUDA directory:
sudo cp cuda/include/cudnn*.h /usr/local/cuda/include
sudo cp cuda/lib64/libcudnn* /usr/local/cuda/lib64
sudo chmod a+r /usr/local/cuda/include/cudnn*.h /usr/local/cuda/lib64/libcudnn*
Conclusion
In this tutorial, we learned how to install CUDA and cuDNN on Ubuntu 20.04. Thanks for reading, please leave your feedback and suggestions.


About The Author
Winnie Ondara

Winnie is a Linux technical writer with over 3 years of experience with various Linux distributions and writing technical guides in Linux. She is passionate about FOSS technologies and always endeavor to learn new technologies. During my free time, I watch movies, listen to music, and catch up with tech news.
Comments