
Rsync (Remote Sync) is a powerful command-line tool for synchronizing files and directories between two locations, either locally on your system or between different servers. It is a popular backup and mirroring tool, as well as an improved copy command for regular use.
Rsync minimizes the amount of data transferred over the network by transferring only the differences between the source and the already-existing files at the destination. It means rsync first does a full copy to the destination and then only the changes. Rsync copies files recursively with compression, and over a secure channel.
Syntax
The basic syntax of rsync is as follows:
rsync [OPTIONS] SRC [DEST]rsync [OPTIONS] SRC [USER@]HOST:DEST rsync [OPTIONS] [USER@]HOST:SRC [DEST]
Where,
[OPTIONS]represents optional rsync command options that you can include to customize the synchronization process.SRCis the source directory or file you want to synchronize.DESTis the destination directory where the files or directories will be copied.[USER@]HOSTspecifies the remote server and an optional username if you're dealing with remote synchronization.
Options
Some of the key options of rsync command:
-a, --archive: Archive mode maintains file permissions, ownership, symbolic links, and copies directories and subdirectories recursively.-z, --compress: Compresses file data during transfer to reduce bandwidth usage.-h, --human-readable: Displays numbers in a human-readable format, making output more user-friendly.-b, --backup: Makes backups of destination files during file transfer.-n, --dry-run: Performs a trial run without making changes, useful for testing before executing.-r, --recursive: Copies directories and subdirectories recursively.--progress: Shows progress during transfer, displaying data transferred, speed, and time left.-e, --rsh: Specifies a different remote shell program for synchronization.-v, --verbose: Increases logging verbosity during the rsync operation.-q, --quiet: Reduces data output, useful when running rsync via cron.--backup=dir: Stores backups on the receiving side in the specified directory, useful for incremental backups.-u, --update: Prevents overwriting destination files that have been modified.--max-size: Prevents the transfer of files larger than the specified size.--min-size: Prevents the transfer of files smaller than the specified size.--remove-source-files: Removes files from the source directory after successful transfer.--ignore-existing: Skips files that already exist at the destination.--delete: Removes unnecessary extra files from the receiving side.--port: Specifies an alternate TCP port number for the rsync daemon to listen on.-i, --itemize-changes: Checks and displays the differences between source and destination files.--bwlimit: Limits the bandwidth used by rsync for efficient network utilization.--ignore-errors: Ignore I/O errors--force: Force deletion of partially transferred files.--link-dest: Creates hard links to files in a previous backup, enabling efficient incremental backups.
Rsync command examples
1. Copy Data Locally
Copy a file locally:
rsync -av /home/linux/backup.sh /home/linux/projects/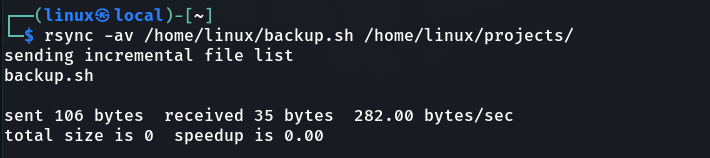
Copy multiple files:
rsync -av /home/linux/backup.sh logs.txt cat.png /home/linux/projects/
The above command copy the files /home/linux/backup.sh, logs.txt, and cat.png to the directory /home/linux/projects/.
Recursively copy files or a directory and its subdirectories:
rsync -rv logs newlogs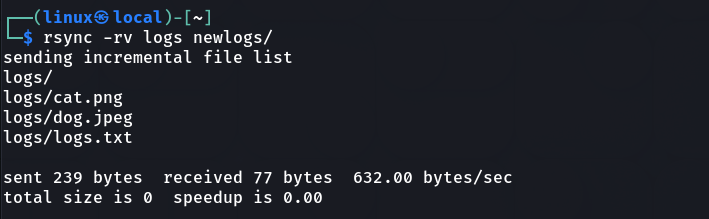
This does a local recursively copy the contents of the logs directory to the newlogs directory.
2. Copy Files from Local to a Remote Server
Copy a file to a remote server:
rsync -v logs.txt [email protected]:~/
The above command transfers the logs.txt file from the local machine to the home directory of the remote user (linux) on the machine with the IP address 192.168.204.59. The -v option provides verbose output during the transfer, showing details of the process.
Before the file transfers can begin, you must enter the remote machine's user password.

3. Copy files from remote to local
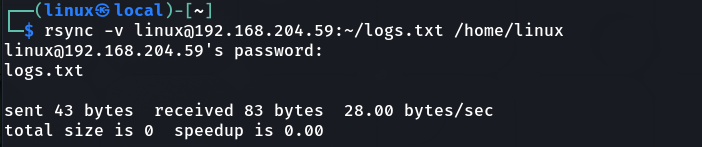
Copy a file from a remote server to a local machine:
rsync -v [email protected]:~/logs.txt /home/linuxHere the command transfers the logs.txt file from the remote machine (specified by the username linux and IP address 192.168.204.59) to the local directory /home/linux.
4. Exclude files or directories
Exclude specific files or directories from the transfer using --exclude.
rsync -arv --exclude 'secret.txt' --exclude 'temp/' /home/linux/mydata/ [email protected]:~/mydata_backup/The above command will copy all files and directories from /home/linux/mydata/ to the remote machine except for secret.txt and the temp directory.
You can also include --exclude-from=/path/to/file to read the list of files and directories to exclude from a file.
5. Include Specific Files
Copy only specific file types (e.g., .sh files):
rsync -zarv --include="*.sh" /source/dir/ /destination/dir/The above command transfers files with the .sh extension and does not include directories or other file types.
An alternative approach for more precise file selection using --include and --exclude options:
rsync -zarv --include="/" --include=".sh" --exclude="*" /source/dir/ /destination/dir/Here the command transfers all directories and files with the .sh extension from the source directory (/source/dir/) to the destination directory (/destination/dir/) while excluding all other files and directories.
Remember that the order of --include and --exclude options can matter.
The following include patterns are supported:
--include="pattern*"
--include="/source/specific_directory/*"
--include="file1.txt" --include="file2.jpg"
6. Limit file transfer size
The --max-size and --min-size options are used to limit the file size that rsync will transfer.
--max-size: This option allows you to specify the maximum size that a file can have to be considered for transfer
For example, copying files of less than 10 MB:
rsync -rv --max-size=10M ~/ source destinationThis would exclude files larger than 10 megabytes from the transfer.
--min-size: Conversely, this option allows you to specify the minimum size that a file must have to be considered for transfer.
7. Remove files from source after successful transfer
The --remove-source-files option is used to remove files from the source directory after they have been successfully transferred to the destination.
rsync av --remove-source-files source/ destionation/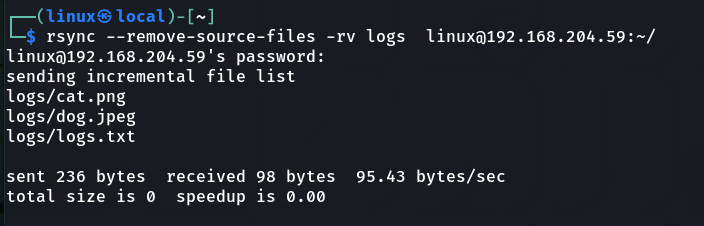
This comes useful when you want to move or backup files to another location while also ensuring that the source files are deleted once the transfer is complete.
8. Perform a Dry Run
Use -n or --dry-run option to preview what rsync would do without actually making any changes to the source or destination.
rsync delete --dry-run -av logs [email protected]:~/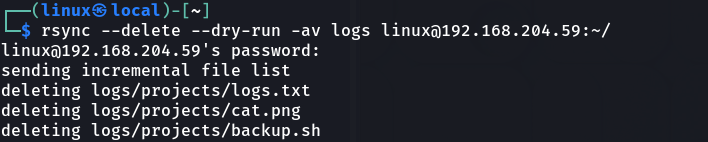
9. Mirror of source
The rsync with -- delete option deletes any files in the destination directory that don't exist in the source directory. It ensures that the destination becomes an exact mirror of the source, removing any extra files or directories in the destination.
rsync --delete -av logs [email protected]:~/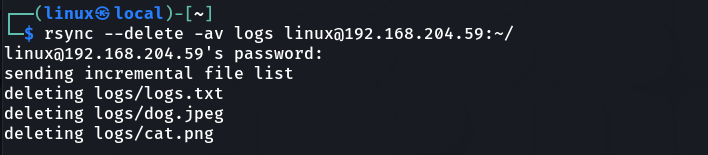
It's good to perform a dry run using -n option initially to prevent data loss. When you are comfortable, remove it.
10. Find differences between SRC and DEST
You can perform a dry run along with --delete and --itemize-changes options to find differences between the source (SRC) and destination (DEST) directories without actually making any changes.
$ rsync --dry-run --delete --recursive --itemize-changes sample/ /mnt/data/
*deleting   lost+found/
*deleting   8gbfile.raw
*deleting   1gbfile.raw
>f+++++++++ uppercase.txt
The -i option (--itemize-changes) offers insight into which files and directories are affected and how they are being modified.
Let's break down the output:
*deleting lost+found/: This line indicates that the lost+found/ directory will be deleted from the destination. Same for the rest two lines.>f+++++++++ uppercase.txt: This line indicates that the file uppercase.txt will be copied from the source to the destination (>).
11. Avoid overwriting modified destination files
When using rsync to synchronize two directories, it typically won't copy a file from the source to the destination if an identical file already exists at the destination.
There might be situations where you have made changes to a file at the destination directory and you want to prevent rsync from overwriting it. In such cases, you can use the -u (or --update) option.
rsync -avu logs/ [email protected]:~/This will copy the contents of the logs/ directory from your local machine to the ~/ directory on the remote machine, but it will only copy files that are newer or have been modified since the last synchronization
12. Display progress during transfer
When you use rsync with --progress, it shows details about each file as it's transferred. It can also generate a lot of output if you're dealing with a large number of files, which may make it less practical for some use cases.
rsync -a --progress ubuntu-22.04.1-desktop-amd642.iso [email protected]:~/backup
On the other hand, --info=progress2 provides statistics based on the entire transfer, giving you an overview of the progress without displaying details for each file.
If you are interested in knowing detailed statistics about the transfer after it's completed use --stats option.
Alternatively, you can use rysnc with pv command.
13. Specify Port
By default, rsync uses the SSH protocol on port 22 for remote transfers, when you specify a remote host using a single colon (:) separator and use port 873 when the source or destination path contains a double colon (::) separator after a host specification.
You can use -e option following -p flag to specify a custom port as the transport.
Example:
rsync -arvz -e "ssh -p 2222" -av /local/path/ user@remote-host:/remote/path/You could also specify a private key for authentication using rsyn -e “ssh -i private.key".
14. Limit transfer bandwidth
Use --bwlimit option. This specifies the maximum data transfer rate in bytes per second.
This example limits the data transfer rate to 1000 bytes per second:
rsync -rv --bwlimit=1000 ~/ linux@remote-host:~/

About The Author
Bobbin Zachariah

Bobbin Zachariah is an experienced Linux engineer who has been supporting infrastructure for many companies. He specializes in Shell scripting, AWS Cloud, JavaScript, and Nodejs. He has qualified Master’s degree in computer science. He holds Red Hat Certified Engineer (RHCE) certification and RedHat Enable Sysadmin.
Comments