
SMART (Self-Monitoring, Analysis, and Reporting Technology) is a feature enabled in all modern hard disk drives and SSDs to monitor/test reliability. It checks different drive attributes to detect the possibility of drive failure. There are different tools available in Linux and Windows to perform the SMART tests.
In this tutorial, we will learn how to test SSD/HDD health in Linux from CLI and GUI
Two methods explained here are:
- Using Smartctl
- Using Gnome Disks
Test SSD Health using Smartctl
Smartctl is a command-line utility tool that can be used to check S.M.A.R.T-enabled HDD or SSD status in the Linux system.
Smartctl utility tool comes with the package smartmontools. The Smartmontools is available by default in all Linux distributions including Ubuntu, RHEL and Centos and Fedora.
To install smartmontools in Linux:
Ubuntu
sudo apt install smartmontools Start the service using the following command.
sudo /etc/init.d/smartmontools startRHEL and CentOS
sudo yum install smartmontoolsFedora
sudo dnf install smartmontoolsSmartd service will start automatically after the successful installation.
If not started, start smartd service:
sudo systemctl start smartdTest health of SSD/HDD
To test overall-health of the drive, type:
sudo smartctl -d ata -H /dev/sdaWhere,
d - Specifies the type of device.
ata - the device type is ATA, use scsi for SCSI device type.
H - Check the device to report its SMART health status.

The result PASSED indicates that the disk drive is good. If the device reports failing health status, this means either that the device has already failed or could fail very soon.
If it indicates failing use -a option to get more information.
sudo smartctl -a /dev/sda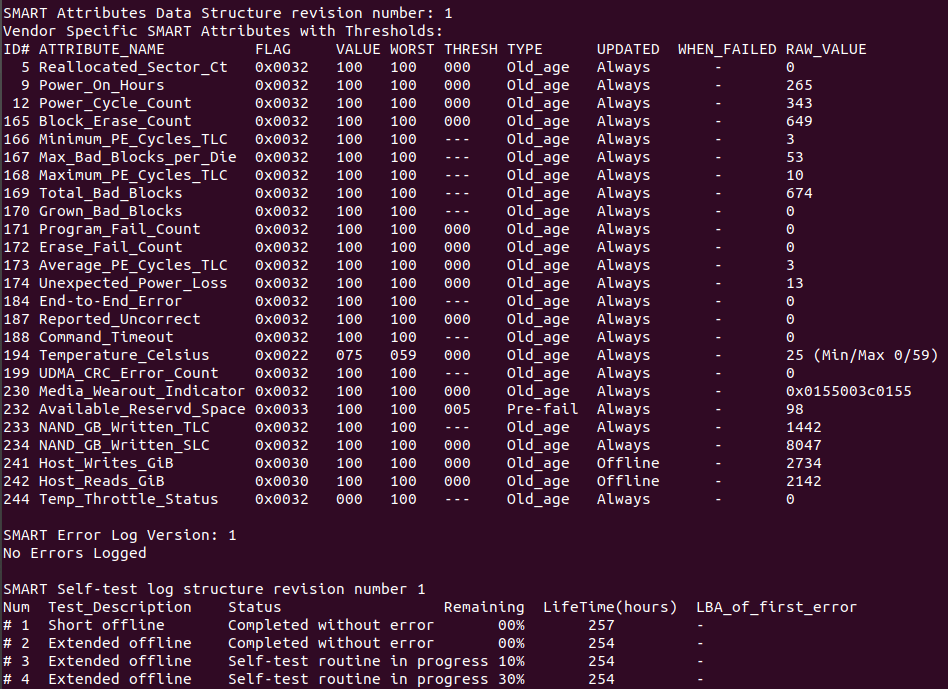
You can monitor the following attributes:
[ID 5] Reallocated Sectors Count - Numbers of sectors reallocated due to read errors.
[ID 187] Reported Uncorrect - Number of uncorrectable errors while accessing read/write to sector.
[ID 230] Media Wearout Indicator - Current state of drive operation based upon the Life Curve.
100 is the BEST value and 0 is the WORST.
Check SMART Attribute Details for more information.
To initiate the extended test (long) using the following command:
sudo smartctl -t long /dev/sda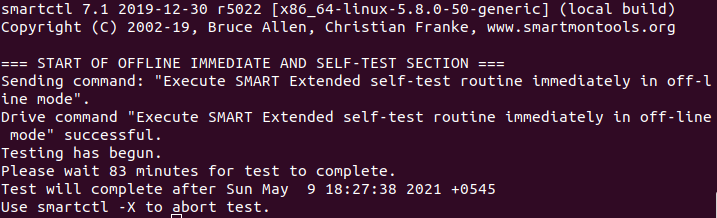
To perform a self test, run:
sudo smartctl -t short /dev/sda
To find drive's self test result, use the following command.
sudo smartctl -l selftest /dev/sda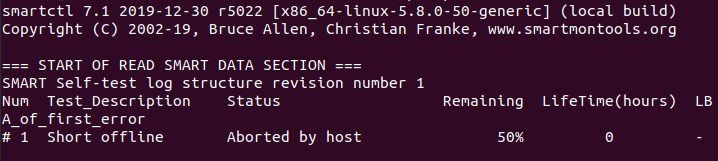
To evaluate estimate time to perform test, run the following command.
sudo smartctl -c /dev/sda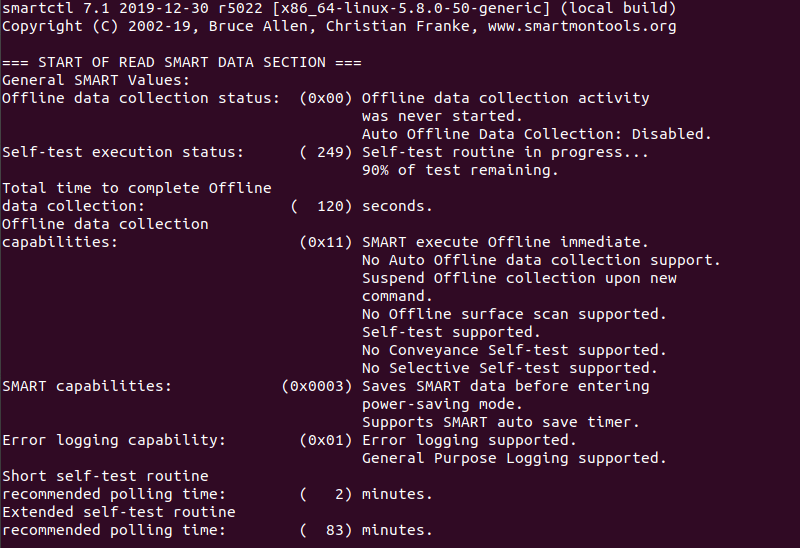
You can print error logs of the disk by using the command:
sudo smartctl -l error /dev/sda
Test SSD/HDD Health using Gnome Disks
With GNOME disks utility you can get a quick review of your SSD drives, format your drives, create a disk image, run standard tests against SSD drives, and restore a disk image.
Install Gnome Disks
In Ubuntu 20.04, the GNOME Disks application comes with the GNOME disk tool installed. If you are unable to find the tool, use the following command to install it.
sudo apt-get install gnome-disk-utilityGNOME Disk is now installed, now you can go to your desktop menu navigate to the application, and launch. From the application, you can overview all your attached drives. You can also use the following command to launch the GNOME Disk application.
sudo gnome-disks 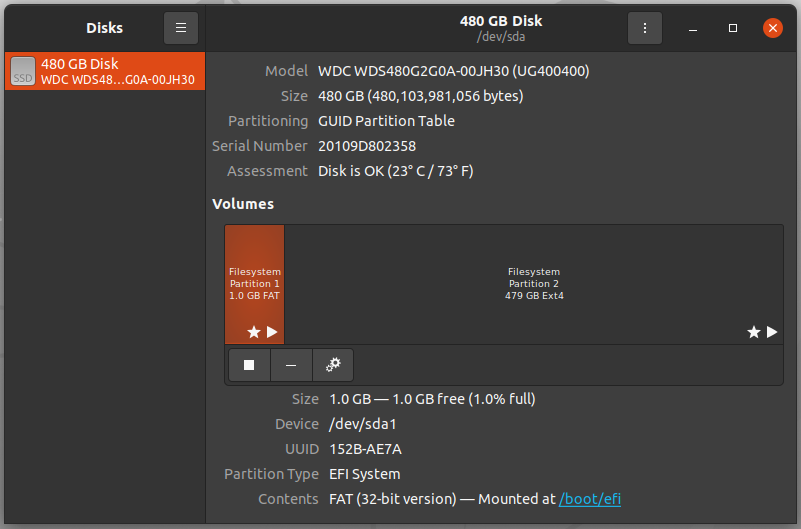
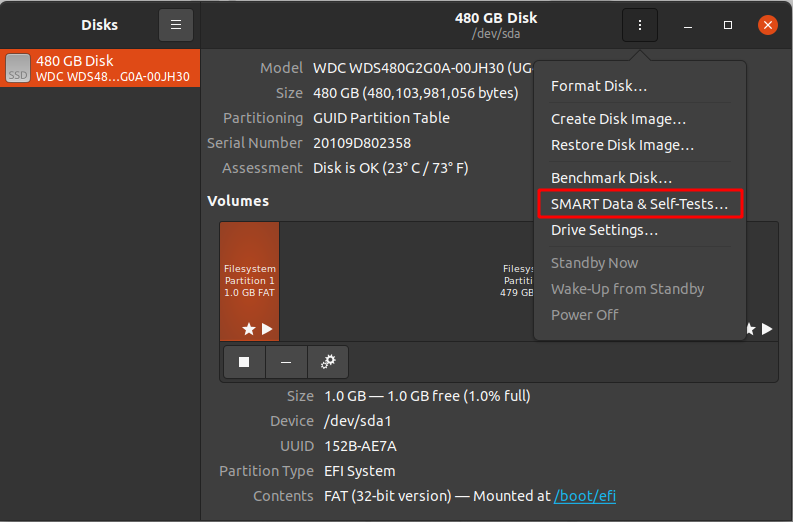
Now the test can be performed on the drives. To do so, launch the GNOME disks and select the disk which you want to test. You can find the quick assessment of the drives such as size, partitioning, Serial number, temp, and health. Click on the gear icon and select SMART Data & Self-tests.
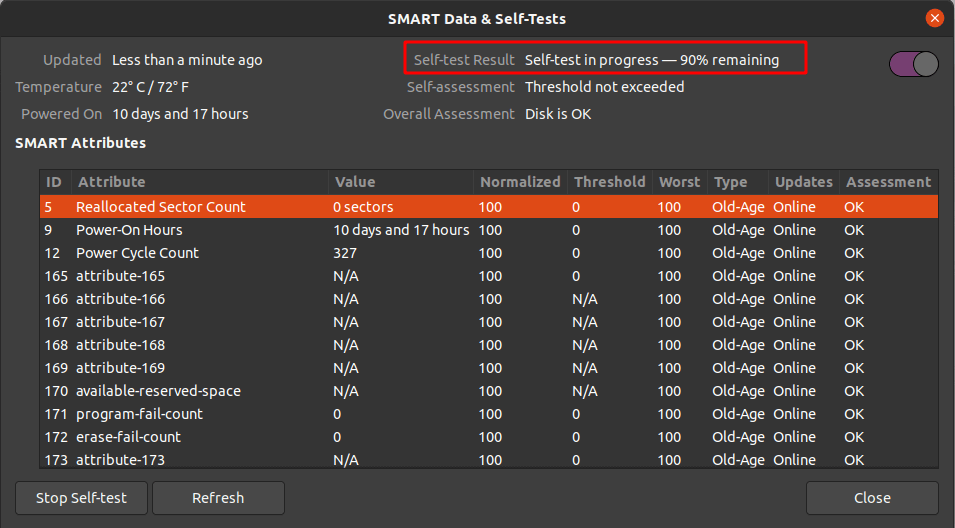
In the new window you can find the results of the last test. In the top right of the window, you can find that the SMART option is enabled. If SMART is disabled, it can be enabled by clicking on the slider. To start the new test click on the Start Self-test button.

Once the Start Self-test button is clicked, a drop down menu will be appeared to select the type of the tests which are Short, Extended and Conveyance. Select the test type and provide your sudo password to continue the test. From the progress meter, percentage of the test complete can be seen.
Conclusion
In this tutorial, I have explained the basic concept of the S.M.A.R.T technology including its uses in the Linux system. Also, I have covered how to install the smartctl command-line utility tool in the Linux machine and how it can be used to monitor the health of hard drives. You have also got an idea about the GNOME Disks utility tool to monitor SSD drives. I hope this article will help you to monitor your SSD drives using smartctl and GNOME Disks utility.


Comments