
The Linux tee command is used to read from standard input (stdin) and write the output to both standard output (stdout) and one or more files simultaneously. It's especially useful when you want to capture the output of a command while still seeing it on your terminal or when you want to log the output of a command to a file.
Syntax
The basic syntax of the tee command is as follows:
tee [OPTIONS] [FILE]Here are some common options used with the tee command:
-aor--append: Append the output to the specified files instead of overwriting them.-ior--ignore-interrupts: Ignore interrupt signals while writing to files.
Examples
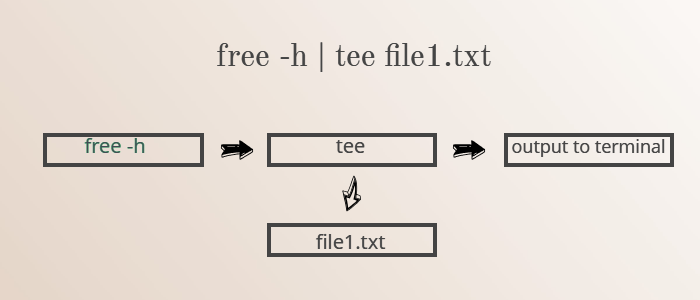
Example 1: Redirecting Output to a File
free -h | tee file1.txt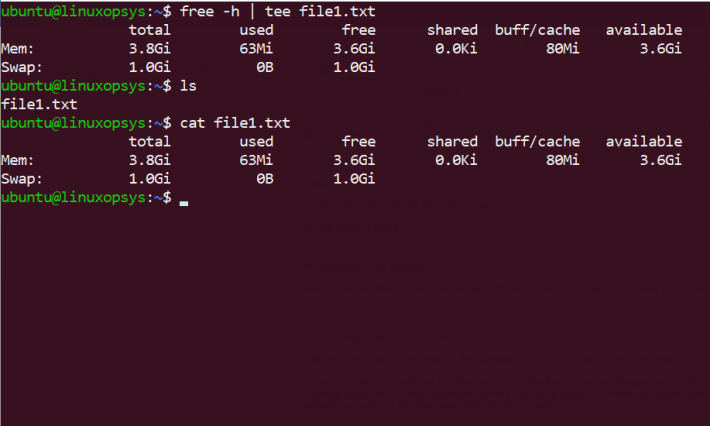
Above command run free -h command and then it will use the tee command to both display the output on the terminal and save it to a file named file1.txt
Example 2: Appending Output to a File
Use -a option specifies that the output should be appended to the file rather than overwriting it if the file already exists.
free -h | tee -a file1.txt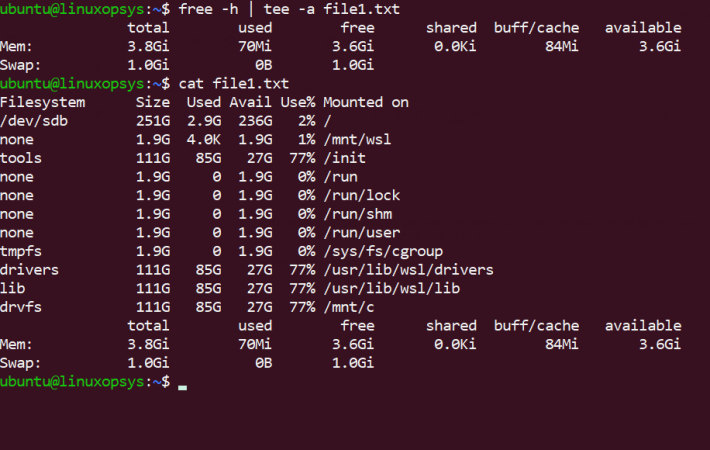
This run free -h command, display its output on the terminal, and append the same output to a file named file1.txt.
Example 3: Writing to Multiple Files
free -h | tee file1.txt file2.txt file3.txt file4.txt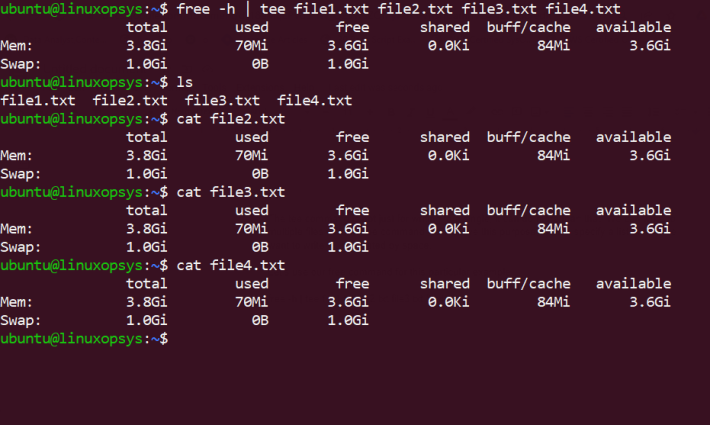
Here display its output on the terminal, and simultaneously write the same output to four different files: file1.txt, file2.txt, file3.txt, and file4.txt.
Example 4: Skip writing to standard output
free -h | tee file1.txt > /dev/null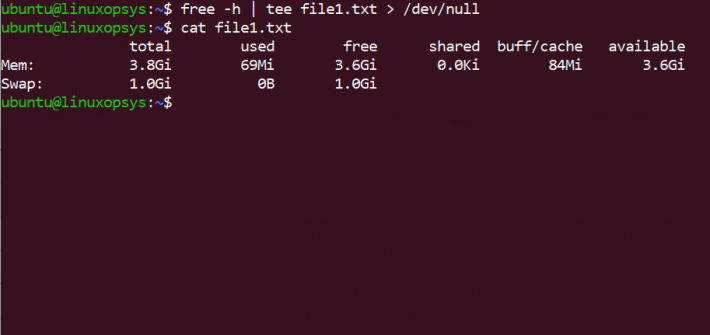
Here by redirecting it to /dev/null, the tee command captures output, but prevents it from being displayed on the standard output (your terminal).
Example 5: Redirect stdout/stderr to terminal and a file
To capture both stdout and stderr in a single file while also displaying them on the terminal, you can use 2>&1.
The tee is often used in combination with 2>&1 to capture both stdout and stderr and write them to a file while still displaying them on the terminal.
Example:
# apt update 2>&1 | tee install.log

WARNING: apt does not have a stable CLI interface. Use with caution in scripts.

Fetched 229 kB in 1s (209 kB/s)
Reading package lists...
Building dependency tree...
Reading state information...
69 packages can be upgraded. Run 'apt list --upgradable' to see them.

# cat install.log

WARNING: apt does not have a stable CLI interface. Use with caution in scripts.

Fetched 229 kB in 1s (209 kB/s)
Reading package lists...
Building dependency tree...
Reading state information...
69 packages can be upgraded. Run 'apt list --upgradable' to see them.
#
Example 6: Ignoring Interrupts
$ some_long_running_command | tee -i output.logIn this case, tee will continue running even if you press Ctrl+C to interrupt some_long_running_command, allowing it to gracefully exit by reading EOF from the pipe while still capturing and logging the data.
Here -i option allows tee to ignore the interrupt signal (SIGINT).
Fix: 'Permission Denied' Errors When Using sudo with tee
sudo echo "add new line" | tee -a practicefile.conf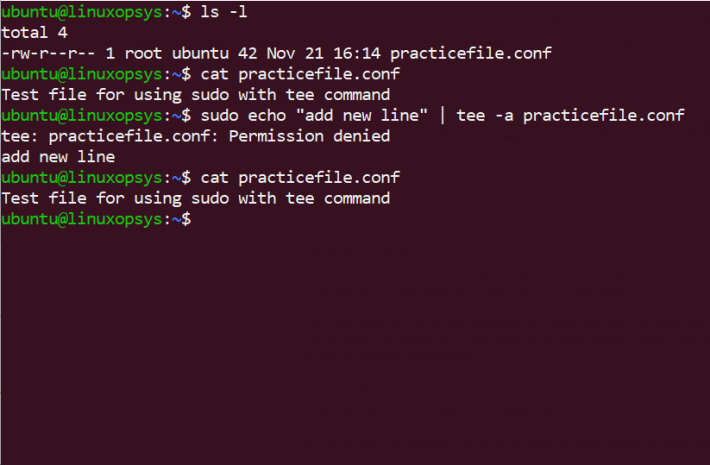
For the above command, the reason you're getting a "permission denied" error is because of how the command is structured.
To correctly append data to a file using sudo, you should use sudo for the entire command, including tee.
echo “add new line” | sudo tee -a practicefile.conf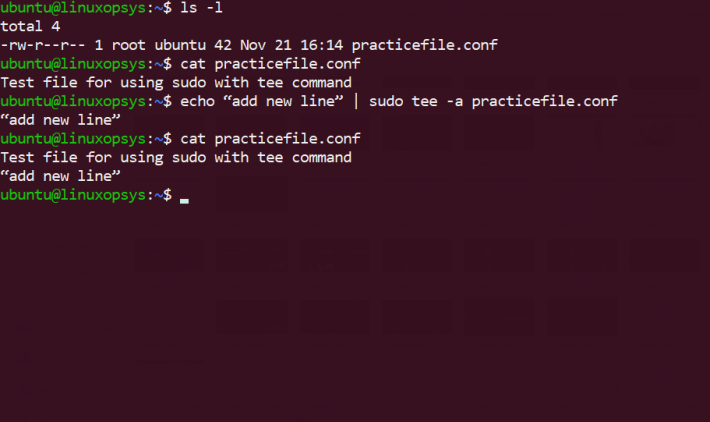
Read: Sudo Permission Denied with Redirect or Pipe [Solutions]


Comments