
File sharing is one of the biggest advantages of the modern network infrastructure. Hosting files on a file server makes them accessible for all the network members with appropriate permissions and it saves a lot of money. To ensure the complete safety of your critical data, several network protocols are supported, such as Common Internet File System (CIFS). You must first mount the CIFS share in Linux to access files, folders, and other data stored on the network share.
This tutorial will teach us how to mount a CIFS Windows share from your Linux system.
Prerequisites
- A working Linux system with terminal access.
- Sudo user privileges to perform CIFS installation.
- Internet connectivity to download and install cifs-utils package.
- Familiarity with the Linux command-line interface.
Step 1: Install the cifs-utils Package
The Linux CIFS filesystem access utility is part of the cifs-utils package. The mount command indirectly invokes the mount.cifs command-line utility that ultimately mounts a CIFS Windows share. This procedure works only on the Linux distributions that support the cifs mounted file system.
Most major Linux distributions, such as RHEL, Fedora, CentOS, Ubuntu, and Debian do not have the CIFS utility suite preinstalled by default. You must explicitly install the CIFS client and tool package to be able to use these commands.
To install CIFS file system access utility on a RHEL, Fedora, CentOS, or other related Linux distributions, use the following command:
sudo yum install cifs-utilsTo install CIFS filesystem access utility on an Ubuntu, Debian, or other related Linux distributions, use the following command:
sudo apt install cifs-utils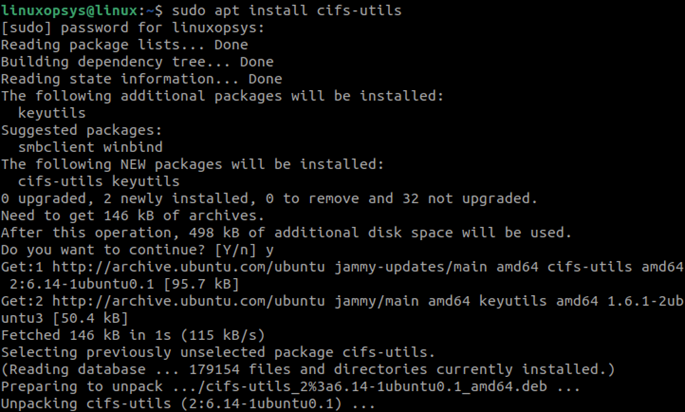
If the CIFS utility package is already installed on your computer, then you should upgrade it before mount Windows share:
sudo apt upgrade cifs-utilsThe CIFS package name could be different for other Linux distributions. Search for the cifs term to install the relevant package for your Linux distribution.
Step 2: Create a Directory to Mount Windows Share
The process of mounting a remote Common Internet File System (CIFS) share is like mounting a normal Linux file system. Start by creating a new directory that will work as a mount point for the remote CIFS Windows share:
sudo mkdir /mnt/cifs_shareStep 3: Mount Windows Share using CIFS
Use the mount command-line utility as the root user or a user with sudo privileges to mount the Windows share:
sudo mount -t cifs -o username=cifs_share_user //CIFS_SHARE_IP_ADDRESS/Windows_share_name /mnt/cifs_shareEnter the CIFS password when prompted:
Password:Note: If the password contains a comma, then it is not read properly. However, if it is defined in a credentials file or password environment variable (also known as PASSWD environment variable), then it is read correctly.
You do not see any output when the command is executed successfully. If the username or password is incorrect, you will see a mount error. To check if the Windows share is mounted successfully, then use the df -h command to check the access.
If the share is mounted Windows share is accessible, the mounted file system’s root directory becomes the mount point. Now you can access and work on the remote files like the local server filesystem files.
You can also provide the password in the command:
sudo mount -t cifs -o username=cifs_share_user,password=cifs_share_password //CIFS_SHARE_IP_ADDRESS/Windows_share_name /mnt/cifs_shareIf the user accessing the Windows share is part of a domain or a windows workgroup, you can provide the domain name in the command:
sudo mount -t cifs -o username=cifs_share_user,domain=domain_name //CIFS_SHARE_IP_ADDRESS/Windows_share_name /mnt/cifs_shareTo ensure absolute security of your Windows share, we recommend you use a credentials file that contains the username, password, and domain name for your Windows share.
You must make the credentials file readable only by the root user or a user with sudo privileges. Use the following format to specify user details in the credentials file:
/etc/cifs-credentials
username=cifs_user
password=cifs_user_password
domain=domain_name
Use the following command to specify a credentials file in the command to access a CIFS share:
sudo mount -t cifs -o credentials=/etc/cifs_credentials //CIFS_SHARE_IP_ADDRESS/Windows_share_name /mnt/cifs_shareSpecify the additional options in a comma-separated list after the -o option. Use the man mount command to see a list of all the mount command options.
Step 4: Create /etc/fstab Entry to Mount CIFS
When you manually mount a Windows share using the mount command, the share is removed from the list of drives after a reboot. To keep the shared drive available even after a system reboot, you can add an entry in the /etc/fstab file.
The /etc/fstab configuration file has entries of all the file systems that instructs your system how and which file system will be mounted when your system starts. The mounted shares are preserved after a system reboot if there is an entry in this file.
You must provide a destination IP address or a hostname of the source system, name of the Windows share, and the local machine mount point in the /etc/fstab file. Follow these steps to add an entry to the file:
1. Use a text editor of your choice to open the /etc/fstab file:
sudo vi /etc/fstab2. Add the following entry to the /etc/fstab file:
//CIFS_SHARE_IP_ADDRESS/share_name /mnt/cifs_share cifs credentials=/etc/cifs_credentials,file_mode=0755,dir_mode=0755 0 0In this example, the first entry is the Windows share IP and name, the second entry is the local mount directory, the type of the share specified as cifs, credentials options, and access mode, and password details.
3. Mount the Windows share using the following command:
sudo mount /mnt/cifs_shareThe mount command in this example will mount the share reading the contents of the /etc/fstab file. When you will reboot your Linux system, the share is automatically mounted, and you do not have to run the command every time you reboot your computer.
Unmount CIFS Windows Share
You need to unmount a mounted CIFS share if you want to detach the share from your computer. After you unmount the Windows share, it cannot be accessed locally. Use the umount command to unmount a share:
sudo umount /mnt/cifs_shareProvide the local mount point path with the umount command. You must have a sudo privileges or the root user access to unmount a Windows share.
If the share is already in use by other users on your system, then you cannot unmount the share. Use the fuser command to list the files that are already in use:
fuser -m /mnt/cifs_shareIf you are not worried about data corruption or any other issues, then you can use the -l option with the umount command. The following command unmounts the Windows share after the usage is over and it performs a lazy unmount:
sudo umount -l /mnt/cifs_shareConclusion
In this tutorial, we learned how to mount the Windows share using the mount command and then unmount the share when not needed. Use the cifs option with the mount command to specify the share type. This procedure covers different mount scenarios that you can use based on your requirements and source system configuration.


About The Author
Subhash Chandra

Subhash Chandra, an Oracle Certified Database Administrator and professional writer, works as a Consulting User Assistance Developer at Oracle, bringing over 15 years of experience to the role. He enjoys sharing his technological passion through how-to articles, simplifying complex concepts in Linux, Windows, Mac OS, and various other platforms and technologies for a wide audience.
Comments