
Zabbix agent is installed on the remote host (target) to monitor the hard drive, memory processor, etc. The agent collects data and sends back to Zabbix Server.
Zabbix agents can use passive or active checks to pass information. In passive check, Zabbix server (poller) requests an agent for certain information, and the agent sends back a value. In the active check, the agent process all data and pushes it to the Zabbix server. However, agent periodically connects the server to collect metric which needs to be monitored.
We will begin by installing Zabbix agent to the remote Ubuntu 20.04 host and later add a host to Zabbix server dashboard.
Step 1: Enable Zabbix repository on remote host
Begin by updating the package lists on the remote host.
sudo apt updateThen download the Zabbix repository Debian file from Zabbix download center as follows.
wget https://repo.zabbix.com/zabbix/5.0/ubuntu/pool/main/z/zabbix-release/zabbix-release_5.0-1+focal_all.debThen enable it using the dpkg command as follows:
sudo dpkg -i zabbix-release_5.0-1+focal_all.debNext, update the package index to ensure the repository is synced
sudo apt updateStep 2: Install Zabbix agent
Once the repository is in place, install Zabbix agent.
sudo apt install zabbix-agentOnce the installation is complete, check whether the Zabbix-agent daemon is running as follows:
sudo systemctl status zabbix-agent
Zabbix-agent listens to port 10050. You might want to confirm this using the netstat command:
sudo netstat -pnltu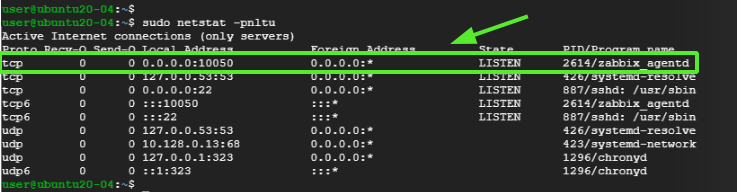
The image above is a confirmation that Zabbix agent service is up and running.
Step 3: Configure Zabbix agent
We are satisfied that the Zabbix agent is running as expected. But that is not enough. We need to make a few changes to the configuration file at /etc/zabbix/zabbix_agentd.conf so that Zabbix agent can communicate with the Zabbix server.
So open the file.
sudo vim /etc/zabbix/zabbix_agentd.confHere we are going to enable passive checks on the agent. First, locate the variable "Server" and "Hostname" in the zabbix_agentd.conf file.
For example, My Zabbix server IP is 10.128.0.16 and the hostname (client system) is ubuntu-20.
Server=10.128.0.16Hostname=ubuntu-20Save the changes and exit the file. Then restart Zabbix agent service to the changes to be effected.
sudo systemctl restart zabbix-agentNote if you are configure active check then look for the variable "ServerActive" and uses port 10051.
Step 4: Configure the firewall
The final step in configuring the host is allowing the port that Zabbix agent listens to across the firewall. If you have UFW firewall enables, execute the commands:
sudo ufw allow 10050/tcpThen reload the firewall
sudo ufw reloadAnd verify that the port has been opened or allowed on the firewall.
sudo ufw status
Perfect! The zabbix-agent should now be in a position to communicate with the server.
Step 5: Add host on Zabbix server
By default, Zabbix only monitors the server on which it is installed. In this section, we will be adding the Zabbix host on the Zabbix server on the browser.
So, login in to your instance of Zabbix Server on the browser.
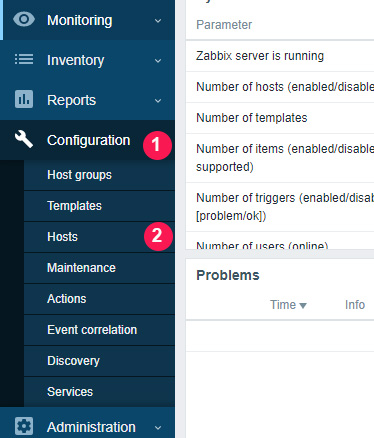
On the left navigation pane, Click on Configuration > Hosts
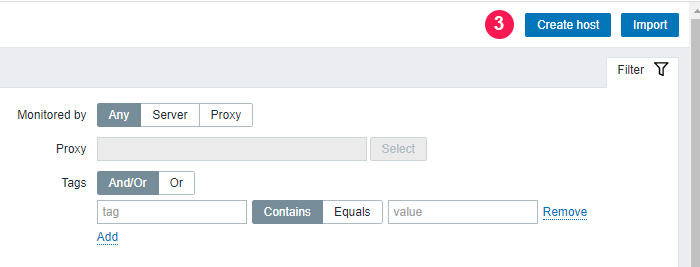
Navigate to the top-right corner and click on 'Create host'
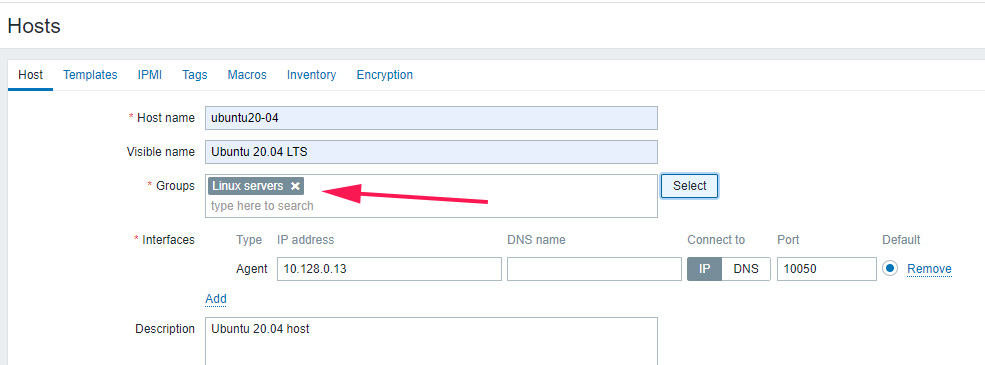
On the window that appears, fill out the remote host details such as hostname. visible name, IP address, a brief description and click on the 'Select' button adjacent to the 'Groups' text field.
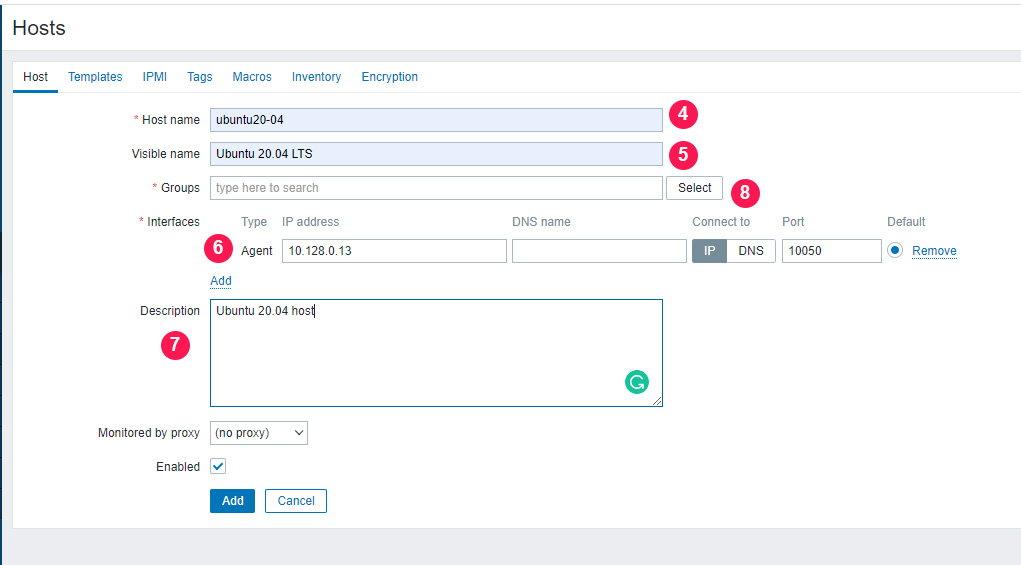
On the list that appears , select 'Linux servers' and click on the 'Select' button.
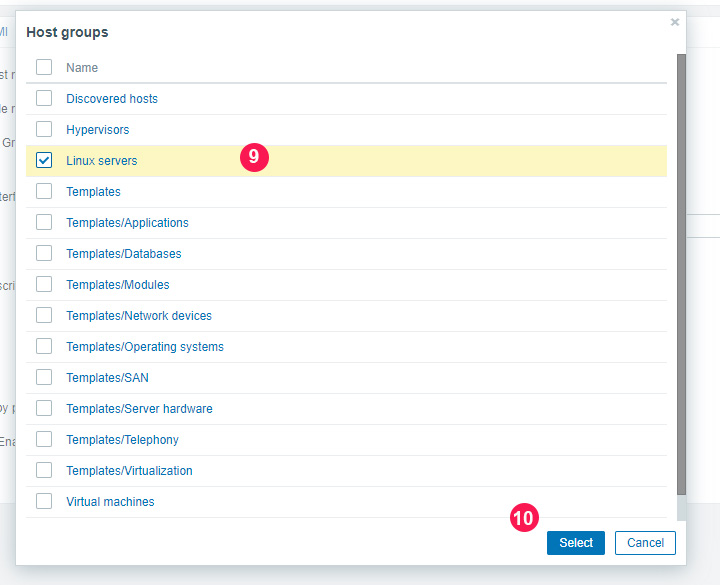
This takes you back and you can view the newly added group as indicated.
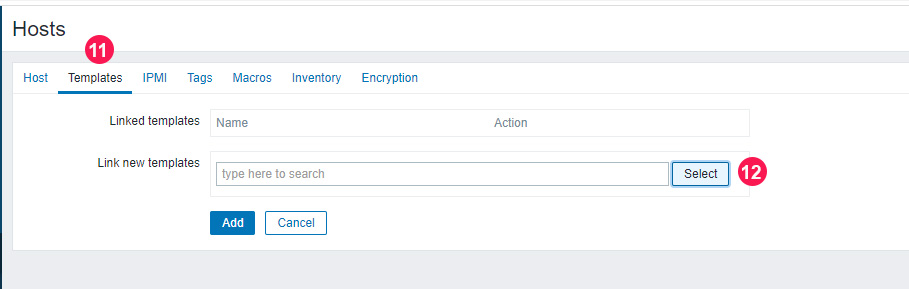
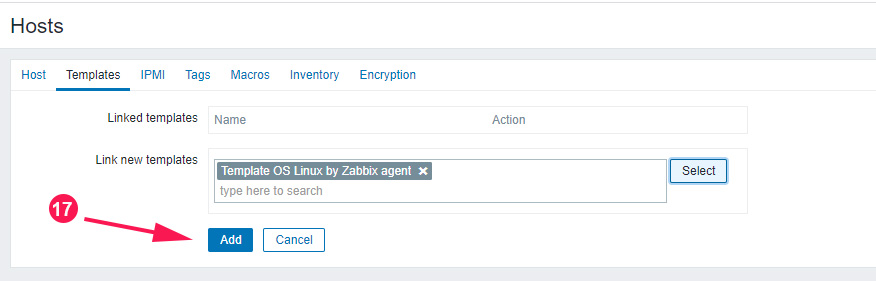
Next, click on the 'Templates' tab and click the 'Select' button adjacent to the 'Link new Templates' text field.
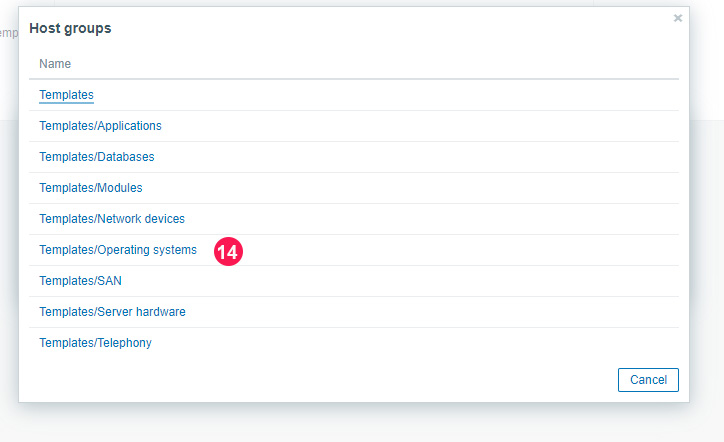
Click on the 'Select' button next to the 'Host group' text field as shown.
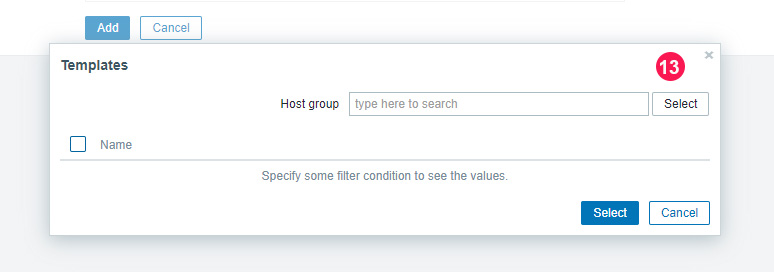
Click on the 'Templates/Operating systems' option as shown.
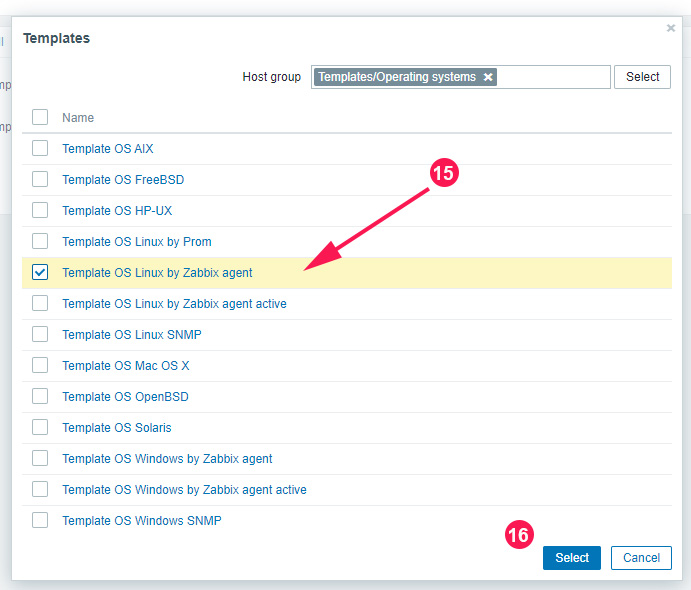
Then select the 'Template OS Linux by Zabbix agent' option and click on 'Select'.
Then finally, click on the 'Add' button.
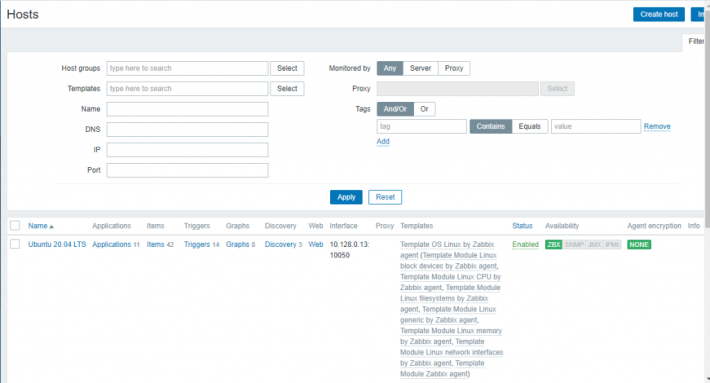
And voila! your host will be listed on the dashboard as shown.
Conclusion
In this tutorial, we learn how to install the Zabbix agent on Ubuntu 20.04 system and configure it to communicate with the Zabbix server. This helps to actively monitor target local resources and applications.


About The Author
Winnie Ondara

Winnie is a Linux technical writer with over 3 years of experience with various Linux distributions and writing technical guides in Linux. She is passionate about FOSS technologies and always endeavor to learn new technologies. During my free time, I watch movies, listen to music, and catch up with tech news.
Comments