
XFCE is a well know desktop environment for Linux, Solaris, and BSD systems. It is a fast, lightweight, user-friendly, GTK toolkit-based desktop environment. It comes with a wide range of applications and Linux users find it very useful and appealing.
You can download Linux Mint 20, in three editions Cinnamon, MATE, or Xfce. Here I will show you how to install Xfce 4.14 (GTK3 based) desktop environment on Linux Mint 20 Ulyana.
Requirement
Installed Linux mint with Cinnamon or MATE desktop
Method 1: Install XFCE from terminal
1. First, update your system
sudo apt update2. Install the XFCE desktop by using the command:
sudo apt-get install xubuntu-desktop -yYou may need to press Y to continue. Wait for some time to download all the necessary package.
3. Reboot the system to switch to Xfce desktop
Method 2: Install XFCE Desktop from GUI
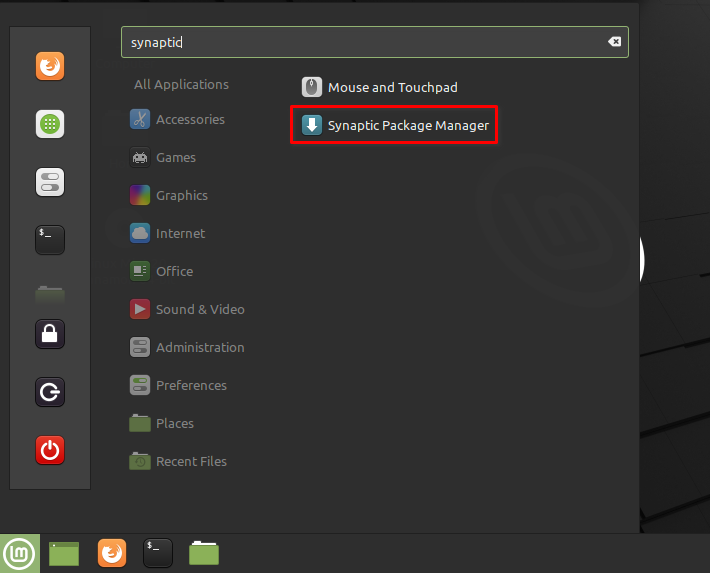
1. Launch Synaptic Package Manager
Synaptic Package Manager is used to install Xfce desktop in GUI mode. Click on 'Synaptic package Manager' by searching from the start menu.
When it prompt for the authentication provide the password. Then, click the Authenticate button.
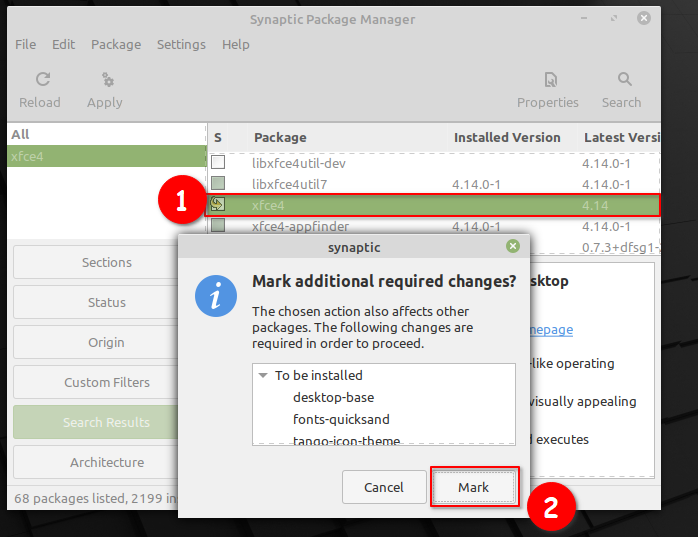
2. Search Xfce4
Now search for Xfce4, double click on it and Click on Mark as shown below.
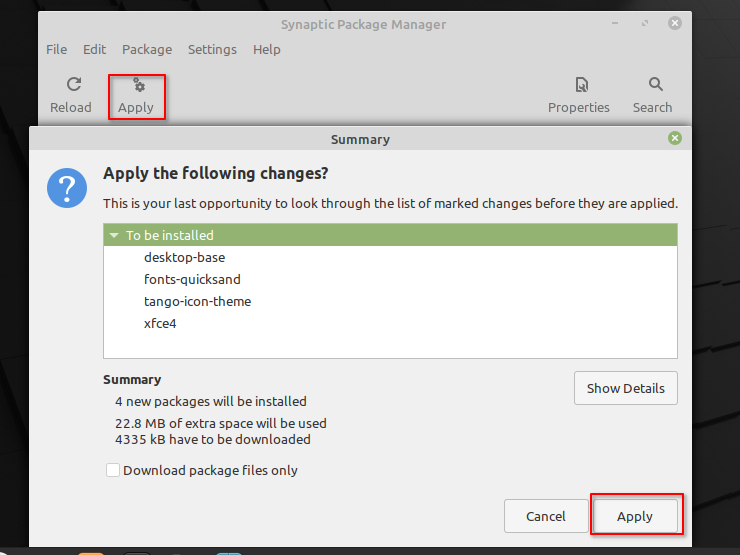
3. To apply changes click on 'Apply' button
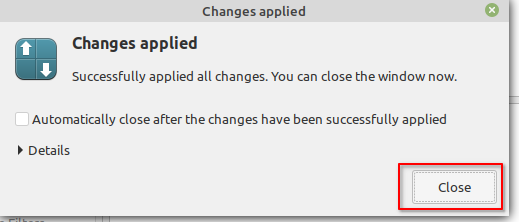
4. Changes applied and close
The following window appears when the installation completes. Click on Close button.
5. Switch to Xfce
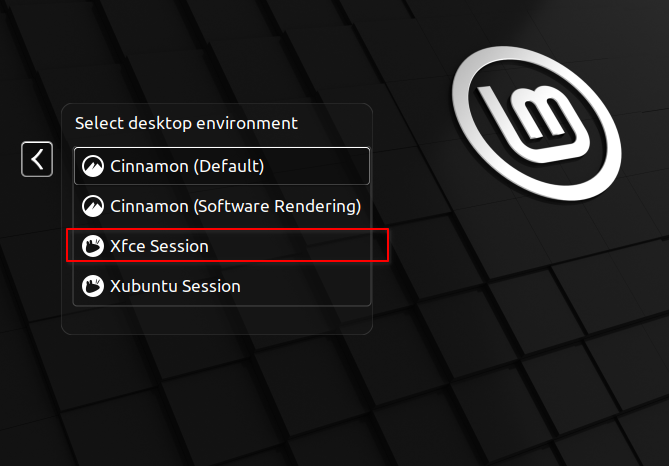
Reboot or log out of the system. The following login screen appears for login click the icon as highlighted below:
6. Select Xfce session
All the desktop environment appears here. Select Xfce Session and sign in:
Now you should see Xfce desktop.
Uninstall Xfce from GUI
Follow the following step to remove Xfce from another GUI:
1. You need to log out of the current desktop and sign in to the previous one.
2. Open the Synaptic Package Manager as in the above step you did during installation.
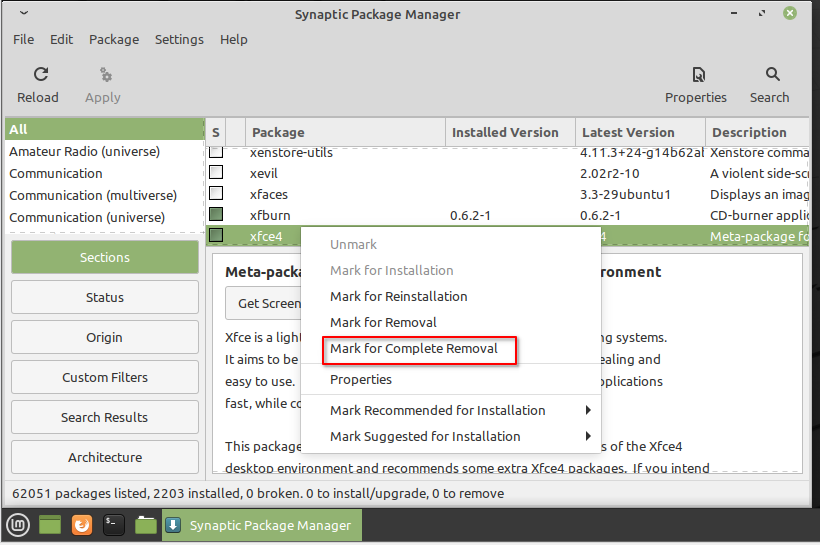
3. Search for the xfce4 package.
4. Right-click the xfce4 package and select Mark for Complete Removal.
5. Click on “Apply”
Uninstall XFCE from terminal
In case you need to uninstall the Xfce, first log out of the current desktop and log in with other environment, and open terminal issue following command.
sudo apt-get remove xubuntu-desktop -yConclusion
We learned how to switch from one desktop environment to Xfce. Please comment below on your experience on using Xfce environment.


Comments