
Modern Linux Distributions already adopted systemd as their service manager. This includes Ubuntu, RHEL, and Fedora. To have new features immediately you can manually install systemd by compiling from the source.
In this tutorial, we learn how to install systemd on the CentOS Stream 9 system
1. Check the Current systemd Version
First of all, confirm the current version of systemd:
systemctl --version
Currently, we have systemd version 250.
2. Get New Systemd File
Download the latest systemd source tar.gz file from Github.
wget https://github.com/systemd/systemd/archive/refs/tags/v251.tar.gzThis downloads systemd source file to the current directory. You may use ls command to verify it.
3. Extract the file
Extract tar gz file using -xf option followed by the archive name.
tar -xf v251.tar.gzChange into the newly created directory:
cd systemd-251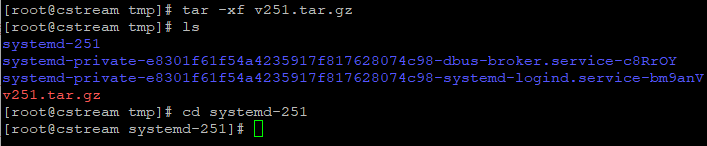
4. Pre-installation preparation
In order to successfully run the configure script, the following packages are required to be installed:
- Development Tools - which contains the gcc/g++ compilers and libraries required to compile packages.
- libcap-devel
- gperf
- glib2-devel
- pip3 - required to install python 3+ packages.
- meson
- ninja and jinja2
We will use yum to install all required packages:
yum groupinstall "Development Tools" yum install libcap-devel yum install gperf yum install glib2-devel yum install python3-pippip3 install --user meson pip3 install ninjapip3 install jinja2
5. Configure
Now let's now configure the package with configure script.
./configure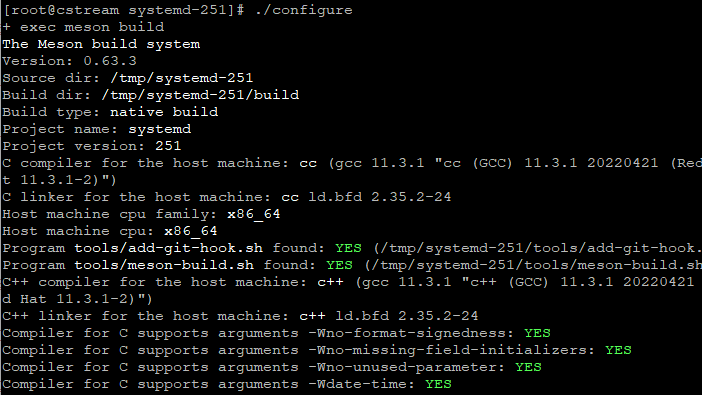
6. Compile
Once the configure script is completed successfully, we proceed with the compilation with make command.
make
It may take a while for this command to complete depending on the system configuration.
You can check if the last command was executed successfully with the following command:
echo $?
0
Here 0 indicated we compiled systemd successfully.
7. Install systemd
Now we install this new version with make install command:
make installIf everything worked fine, you will be able to see the newly installed version by checking the systemd version:

The above output shows, we have successfully installed systemd version 251. Perform a reboot to make sure everything runs as normal. You should see the systemd system running by checking ps 1.
Conclusion
Here we have installed systemd by downloading the latest source file and compiling it. This is recommended only for advanced users to experience a fresh version.
Let us know how it goes for you in the below comment section.


About The Author
Bobbin Zachariah

Bobbin Zachariah is an experienced Linux engineer who has been supporting infrastructure for many companies. He specializes in Shell scripting, AWS Cloud, JavaScript, and Nodejs. He has qualified Master’s degree in computer science. He holds Red Hat Certified Engineer (RHCE) certification and RedHat Enable Sysadmin.
Comments