
Prometheus is a free and open-source monitoring and alerting tool that was initially used for monitoring metrics at SoundCloud back in 2012. It is written in Go programming language.
Prometheus monitors and records real-time events in a time-series database. Since then it has grown in leaps and bounds and had been adopted by many organizations to monitor their infrastructure metrics. Prometheus provides flexible queries and real-time alerting which helps in quick diagnosis and troubleshooting of errors.
Prometheus comprises the following major components:
- The main Prometheus server for scraping and storing time-series data.
- Unique exporters for services such as Graphite, HAProxy, StatsD and so much more
- An alert manager for handling alerts
- A push-gateway for supporting transient jobs
- Client libraries for instrumenting application code
In this tutorial, we learn how to install Prometheus on Ubuntu 20.04.
What you need:
The following are the minimum requirements that you need to have before getting started out:
- An instance of an Ubuntu server with a configured sudo user
- 2 GB RAM and 1 vCPU
- SSH access to the server
Step 1: Update the system
Start off by updating the package lists as follows:
sudo apt updateOnce the package index is refreshed and up to date, head over to the next step.
Step 2: Download and install Prometheus
Prometheus installation files come in precompiled binaries in compressed tarball or zipped files. To download Prometheus, head over to the official download page. At the moment of writing this guide, the latest version of Prometheus is 2.31.0.
But first, we need to create the configuration and data directories for Prometheus.
To create the configuration directory, run the command:
sudo mkdir -p /etc/prometheusFor the data directory, execute:
sudo mkdir -p /var/lib/prometheusOnce the directories are created, grab the compressed installation file:
wget https://github.com/prometheus/prometheus/releases/download/v2.31.0/prometheus-2.31.0.linux-amd64.tar.gz Once downloaded, extract the tarball file.
tar -xvf prometheus-2.31.3.linux-amd64.tar.gzThen navigate to the Prometheus folder.
cd prometheus-2.31.3.linux-amd64Once in the directory move the prometheus and promtool binary files to /usr/local/bin/ folder.
sudo mv prometheus promtool /usr/local/bin/Additionally, move console files in console directory and library files in the console_libraries directory to /etc/prometheus/ directory.
sudo mv consoles/ console_libraries/ /etc/prometheus/Also, ensure to move the prometheus.yml template configuration file to the /etc/prometheus/ directory.
sudo mv prometheus.yml /etc/prometheus/prometheus.ymlAt this point, Prometheus has been successfully installed. To check the version of Prometheus installed, run the command:
prometheus --versionOutput:
prometheus, version 2.31.3 (branch: HEAD, revision: f29caccc42557f6a8ec30ea9b3c8c089391bd5df)
build user: root@5cff4265f0e3
build date: 20211005-16:10:52
go version: go1.17.1
platform: linux/amd64
promtool --versionOutput:
promtool, version 2.31.3 (branch: HEAD, revision: f29caccc42557f6a8ec30ea9b3c8c089391bd5df)
build user: root@5cff4265f0e3
build date: 20211005-16:10:52
go version: go1.17.1
platform: linux/amd64
If your output resembles what I have, then you are on the right track. In the next step, we will create a system group and user.
Step 3: Configure System group and user
It's essential that we create a Prometheus group and user before proceeding to the next step which involves creating a system file for Prometheus.
To create a prometheus group execute the command:
sudo groupadd --system prometheusThereafter, Create prometheus user and assign it to the just-created prometheus group.
sudo useradd -s /sbin/nologin --system -g prometheus prometheusNext, configure the directory ownership and permissions as follows.
sudo chown -R prometheus:prometheus /etc/prometheus/ /var/lib/prometheus/
sudo chmod -R 775 /etc/prometheus/ /var/lib/prometheus/
The only part remaining is to make Prometheus a systemd service so that we can easily manage its running status.
Step 4: Create a systemd file for Prometheus
Using your favorite text editor, create a systemd service file:
sudo vim /etc/systemd/system/prometheus.servicePaste the following lines of code.
[Unit]
Description=Prometheus
Wants=network-online.target
After=network-online.target

[Service]
User=prometheus
Group=prometheus
Restart=always
Type=simple
ExecStart=/usr/local/bin/prometheus \
    --config.file=/etc/prometheus/prometheus.yml \
    --storage.tsdb.path=/var/lib/prometheus/ \
    --web.console.templates=/etc/prometheus/consoles \
    --web.console.libraries=/etc/prometheus/console_libraries \
    --web.listen-address=0.0.0.0:9090

[Install]
WantedBy=multi-user.target
Save the changes and exit the systemd file.
Then proceed and start the Prometheus service.
sudo systemctl start prometheusEnable the Prometheus service to run at startup. Therefore invoke the command:
sudo systemctl enable prometheusThen confirm the status of the Prometheus service.
sudo systemctl status prometheus
Step 5: Access Prometheus
Finally, to access Prometheus, launch your browser and visit your server's IP address followed by port 9090.
If you have a UFW firewall running, open the 9090 port:
sudo ufw allow 9090/tcpsudo ufw reloadBack to your browser. Head over to the address indicated.
http://server-ip:9090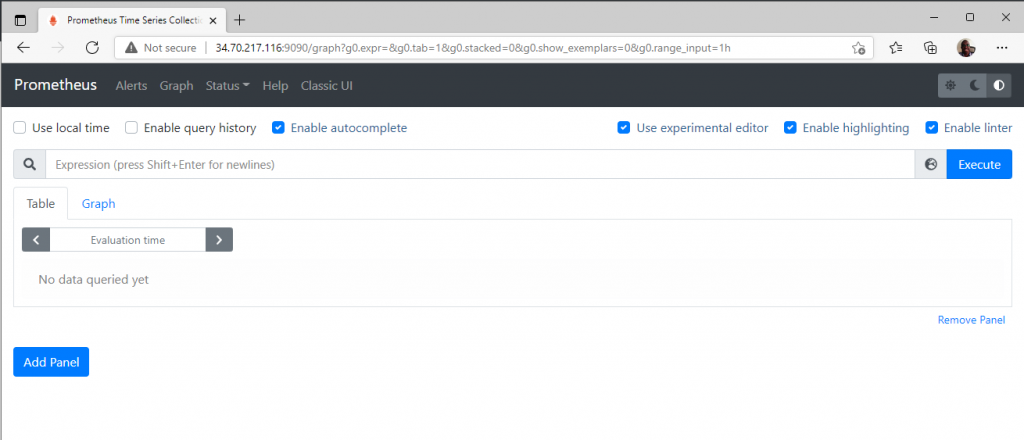
Conclusion
In this tutorial, we learned how to install Prometheus on Ubuntu 20.04. From here, you can now start monitoring various events and time-based metrics. For additional information, head over to the official Prometheus documentation.


About The Author
James Kiarie

James Kiarie is a skilled and certified LPIC Linux administrator with a strong passion for technical writing, specializing in the Linux domain. With over four years of experience, he has crafted numerous technical guides, helping a wide audience navigate through various Linux distributions.
Comments