
i3 is an open-source tiling manager for X11 display manager. It is a fast and lightweight tiling manager that is resource-friendly and targets advanced users. i3 is specifically designed for GNU/Linux and BSD platforms and is licensed under the BSD license. It supports tabbed layout, stacking, and tiling.
In this guide, we learn how to install i3 tiling manager and configure it on Linux.
Why i3 is the best
i3 has steadily gained popularity as a Windows tiling manager of choice for a couple of reasons. Here are some of the salient reasons why i3 is one of the most popular tiling window managers.
i3 is minimalistic
The i3 tiling window manager is stripped down to its bare minimum. It does not contain any kind of bloatware or unnecessary programs. It is extremely lightweight and fast and considered neat and simple. This also means that the utilization of system resources will be optimized leaving extra resources to handle more intensive workloads.
Easy to control with a keyboard
i3 is a keyboard-oriented window manager. This implies that it leverages so much on the keyboard to control various aspects of your display environment. You can resize windows, launch applications and the terminal window, change layouts, switch workspaces and so much more.
With that in mind, you need to have the keyboard shortcuts at your fingertips to get around the tiling manager.
Easily customizable
i3 window manager is flexible and easily customizable. You can control every aspect by simply making changes to the default configuration file. You can change keyboard shortcuts, rename workspaces, modify the status bar, switch to full screen mode, and perform any other task. All the settings are contained in the i3 config file.
Easy to manage workspaces
i3 provides an easy and quick way of organizing your workspace to suit your style and preference. For example, you can group windows to suit your workflow, assign specific applications to different workspaces, navigate between workspaces and so much more.
1. Installation
Arch / Manjaro
a. Install i3
Type the following command in the terminal:
sudo pacman -S i3When it asks which packages to install, showing the possible options, only hit enter and it will install all the necessary ones.
b. Edit Xinitrc
Type the following command in the terminal:
echo "exec i3" >> ~/.xinitrcIf you have another window manager or desktop environment installed, you may be able to choose i3 as a window manager via the desktop manager.
If you don't have a desktop manager to choose i3, or you want it as your unique window manager, remove or comment the lines of the other window managers/desktop environments installed in your system. They are placed in Xinitrc too.
c. Install Xorg
sudo pacman -S xorg xorg-xinitd. Start i3
startxFedora
On Fedora, run the following command. We have tried this on Fedora 36.
sudo dnf install i3Reboot and select i3 in the display manager. Select i3, sign in and enjoy!
Ubuntu / Debian
On Debian and Ubuntu distributions, run the following commands to install the i3 window manager. These commands were tried on Debian 11 and Ubuntu 22.04
sudo apt install i3The tutorial was made using Ubuntu and we can continue with the configuration.
2. Configure i3
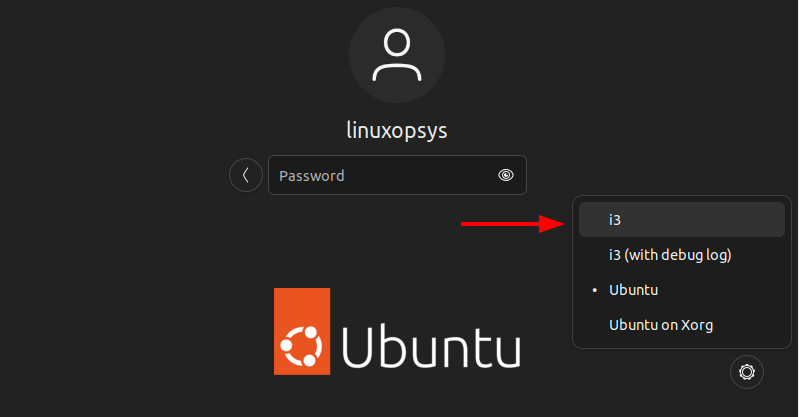
Once you have installed the i3 tiling window manager, restart your Linux system and on the login screen, select the i3 window manager option. Then type in your password and login.
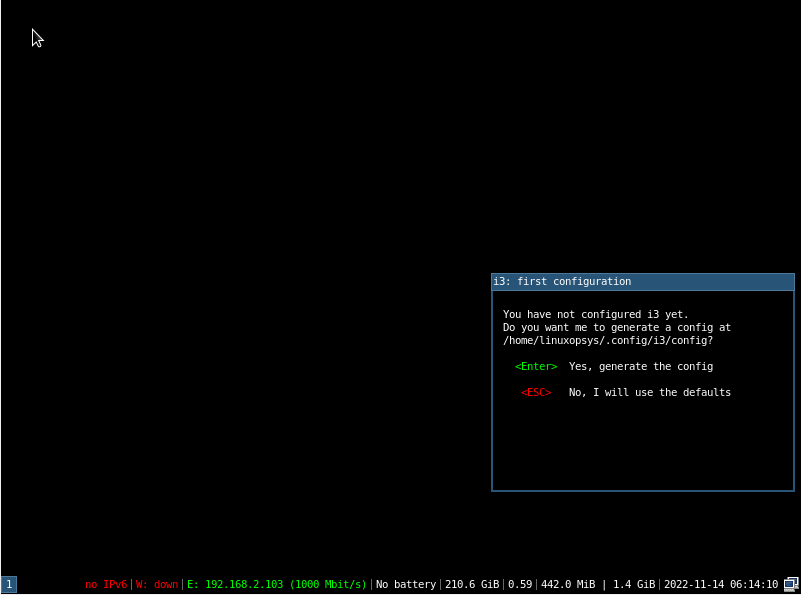
Once you are logged into your system, a blank screen will be displayed. To the right hand side, a window pane will prompt you to either generate a configuration file which will be saved in your home directory ( in this case /home/linuxopsys/.config/i3/config) or use the default configuration which will be placed in the /etc/i3 directory.
In this case we will simply generate the configuration file by pressing ENTER.
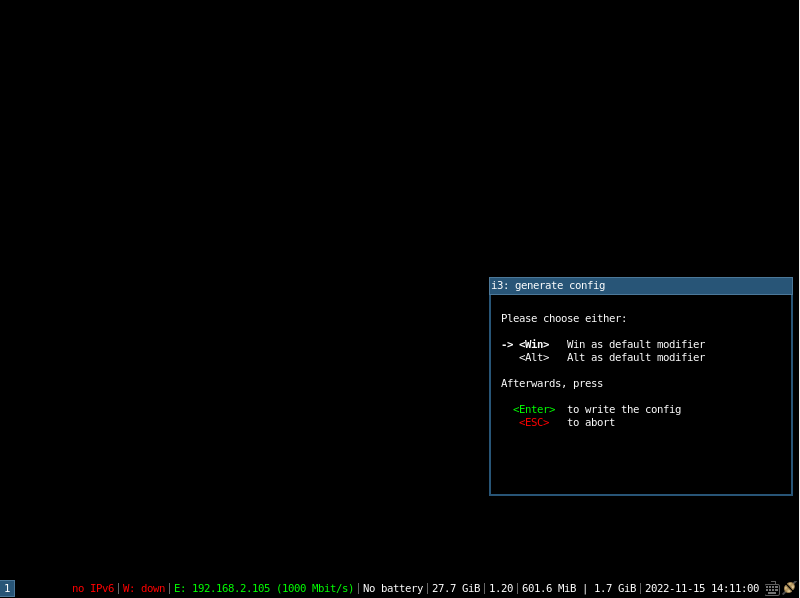
Next, you will be required to specify the modifier key. also referred to as the $mod key. This can either be the Windows logo key or the Alt Key. Here we will opt to go with the Windows key as the $mod key.
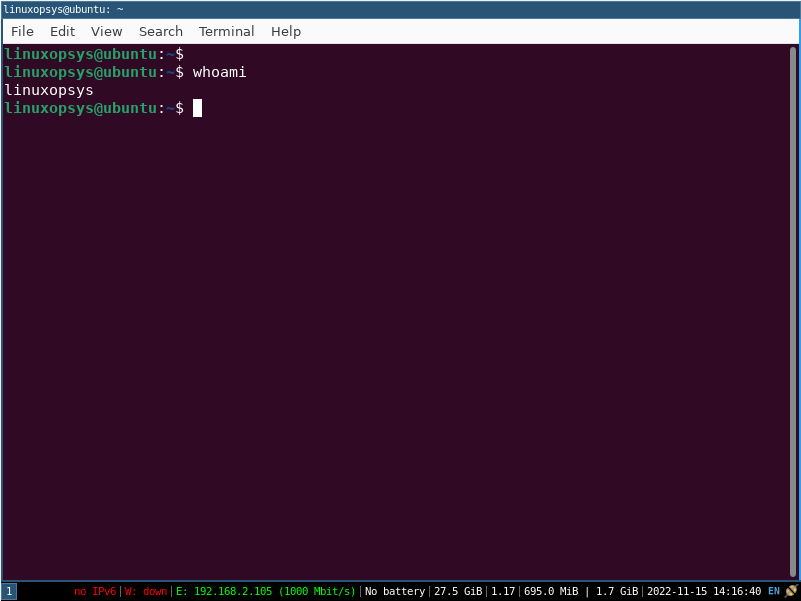
Thereafter, you will be left with a blank screen with a status bar at the bottom of the screen displaying system information such as the IP address, bandwidth, battery status, available disk space and time and date.
Sample i3 config file for reference:
# This file has been auto-generated by i3-config-wizard(1).
# It will not be overwritten, so edit it as you like.
#
# Should you change your keyboard layout some time, delete
# this file and re-run i3-config-wizard(1).
#

# i3 config file (v4)
#
# Please see http://i3wm.org/docs/userguide.html for a complete reference!

set $mod Mod4

# Font for window titles. Will also be used by the bar unless a different font
# is used in the bar {} block below.
font pango:monospace 8

# This font is widely installed, provides lots of unicode glyphs, right-to-left
# text rendering and scalability on retina/hidpi displays (thanks to pango).
#font pango:DejaVu Sans Mono 8

# Before i3 v4.8, we used to recommend this one as the default:
# font -misc-fixed-medium-r-normal--13-120-75-75-C-70-iso10646-1
# The font above is very space-efficient, that is, it looks good, sharp and
# clear in small sizes. However, its unicode glyph coverage is limited, the old
# X core fonts rendering does not support right-to-left and this being a bitmap
# font, it doesn’t scale on retina/hidpi displays.

# Use Mouse+$mod to drag floating windows to their wanted position
floating_modifier $mod

# start a terminal
bindsym $mod+Return exec xfce4-terminal

# kill focused window
bindsym $mod+Shift+q kill

# start dmenu (a program launcher)
bindsym $mod+d exec dmenu_run

# For use with xfce4 whisker popup menu in Mint XFCE:
# bindsym $mod+Shift+d exec dmenu_run
# bindsym $mod+d exec --no-startup-id xfce4-popup-whiskermenu


# There also is the (new) i3-dmenu-desktop which only displays applications
# shipping a .desktop file. It is a wrapper around dmenu, so you need that
# installed.
# bindsym $mod+d exec --no-startup-id i3-dmenu-desktop

# change focus
bindsym $mod+j focus left
bindsym $mod+k focus down
bindsym $mod+l focus up
bindsym $mod+semicolon focus right

# alternatively, you can use the cursor keys:
bindsym $mod+Left focus left
bindsym $mod+Down focus down
bindsym $mod+Up focus up
bindsym $mod+Right focus right

# move focused window
bindsym $mod+Shift+j move left
bindsym $mod+Shift+k move down
bindsym $mod+Shift+l move up
bindsym $mod+Shift+semicolon move right

# alternatively, you can use the cursor keys:
bindsym $mod+Shift+Left move left
bindsym $mod+Shift+Down move down
bindsym $mod+Shift+Up move up
bindsym $mod+Shift+Right move right

# split in horizontal orientation
bindsym $mod+h split h

# split in vertical orientation
bindsym $mod+v split v

# enter fullscreen mode for the focused container
bindsym $mod+f fullscreen toggle

# change container layout (stacked, tabbed, toggle split)
bindsym $mod+s layout stacking
bindsym $mod+w layout tabbed
bindsym $mod+e layout toggle split

# toggle tiling / floating
bindsym $mod+Shift+space floating toggle

# change focus between tiling / floating windows
bindsym $mod+space focus mode_toggle

# focus the parent container
bindsym $mod+a focus parent

# focus the child container
#bindsym $mod+d focus child

# switch to workspace
bindsym $mod+1 workspace 1
bindsym $mod+2 workspace 2
bindsym $mod+3 workspace 3
bindsym $mod+4 workspace 4
bindsym $mod+5 workspace 5
bindsym $mod+6 workspace 6
bindsym $mod+7 workspace 7
bindsym $mod+8 workspace 8
bindsym $mod+9 workspace 9
bindsym $mod+0 workspace 10

# move focused container to workspace
bindsym $mod+Shift+1 move container to workspace 1
bindsym $mod+Shift+2 move container to workspace 2
bindsym $mod+Shift+3 move container to workspace 3
bindsym $mod+Shift+4 move container to workspace 4
bindsym $mod+Shift+5 move container to workspace 5
bindsym $mod+Shift+6 move container to workspace 6
bindsym $mod+Shift+7 move container to workspace 7
bindsym $mod+Shift+8 move container to workspace 8
bindsym $mod+Shift+9 move container to workspace 9
bindsym $mod+Shift+0 move container to workspace 10

# reload the configuration file
bindsym $mod+Shift+c reload
# restart i3 inplace (preserves your layout/session, can be used to upgrade i3)
bindsym $mod+Shift+r restart
# exit i3 (logs you out of your X session)
#-old-#bindsym $mod+Shift+e exec "i3-nagbar -t warning -m 'You pressed the exit shortcut. Do you really want to exit i3? This will end your X session.' -b 'Yes, exit i3' 'i3-msg exit'"
bindsym $mod+Shift+e exec xfce4-session-logout

# resize window (you can also use the mouse for that)
mode "resize" {
# These bindings trigger as soon as you enter the resize mode

# Pressing left will shrink the window’s width.
# Pressing right will grow the window’s width.
# Pressing up will shrink the window’s height.
# Pressing down will grow the window’s height.
bindsym j resize shrink width 10 px or 10 ppt
bindsym k resize grow height 10 px or 10 ppt
bindsym l resize shrink height 10 px or 10 ppt
bindsym semicolon resize grow width 10 px or 10 ppt

# same bindings, but for the arrow keys
bindsym Left resize shrink width 10 px or 10 ppt
bindsym Down resize grow height 10 px or 10 ppt
bindsym Up resize shrink height 10 px or 10 ppt
bindsym Right resize grow width 10 px or 10 ppt

# back to normal: Enter or Escape
bindsym Return mode "default"
bindsym Escape mode "default"
}

bindsym $mod+r mode "resize"

# Start i3bar to display a workspace bar (plus the system information i3status
# finds out, if available)


#-old-#bar {
#-old-# status_command i3status
#-old-#}
exec --no-startup-id nitrogen --restore
exec --no-startup-id synergy
3. Using i3 window manager
By default i3 comes with its own keyboard shortcuts. For example:
To launch the terminal, press the keyboard combination $mod + ENTER.
If you press $mod + ENTER again, the new terminal will be opened adjacent to the existing terminal splitting the screen into half. From what you can see, the workspace is split into two halves ( horizontally be default ).
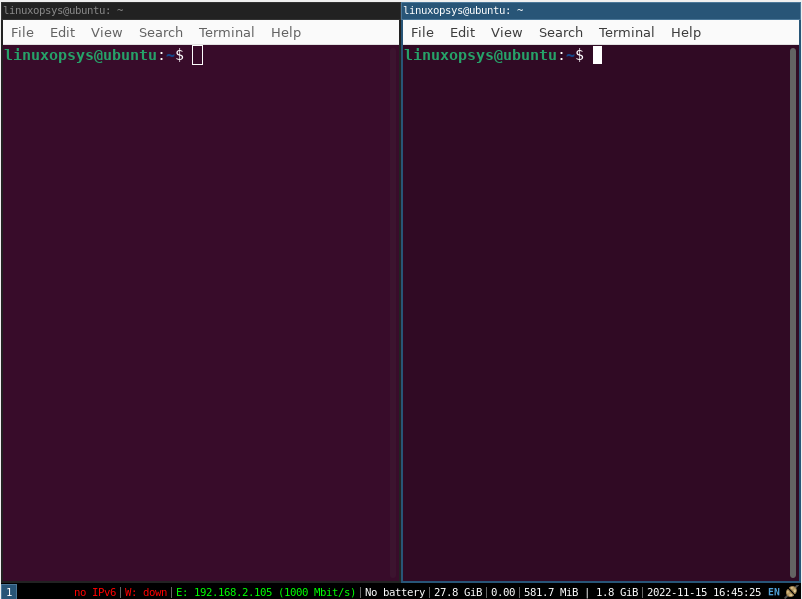
To split a window vertically, press $mod+v before you create the new window. To split it horizontally, press $mod+h.
Navigating between open windows
To move between the windows. you can use the following keyboard shortcuts.
$mod+j left
$mod+; right
$mod+k down
$mod+l up
Changing the container layouts
There are three different modes for container layouts:
splith/splitv
Here the windows are such that every window gets an equal amount of space in the container. splith arranges the windows horizontally ( windows are arranged one beside each other) while splitv arranges them vertically ( windows are arranges one on top of each other )
stacking
This is where only the focused window in the container is displayed. The list of other windows is displayed at the top of the container.
Tabbed
This is just the same as stacking, however, the list of windows at the top is made up of a vertically split single line.
To switch modes, press $mod+e for splith/splitv (it toggles), $mod+s for stacking and $mod+w for tabbed.
Launching applications
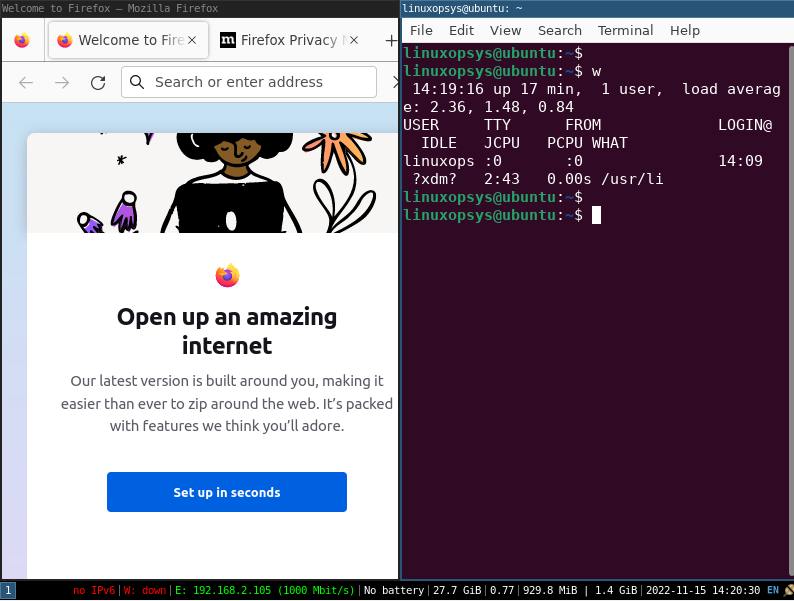
To launch an application , press $mod + d. This opens a search bar at the top of the screen also referred to as the menu. This allows you to type the name of the application you want to launch. In this example, we are launching Firefox browser. So, type your preferred application and hit ENTER.

If two or more application windows are present, they are tiled vertically as shown. Obviously, the workspaces seem too congested.
For a better and smoother viewing experience, you have floating windows whereby open windows float over others. For example, you can have the terminal window float over the Firefox browser by pressing the $mod + shift + space keyboard combination.
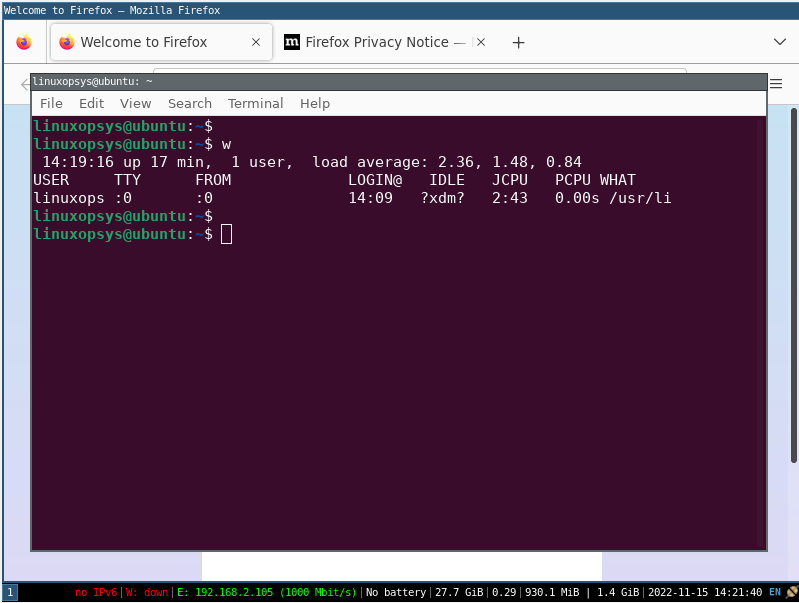
You can set the window to full-screen mode pressing $mod + f combination on the keyboard.
Other basic command shortcuts include:
Toggle fullscreen mode ( on and off ): $mod + f
Close an application window: $mod + shift + q
Restart i3: $mod + shift + r
Exit i3 windows manager: $mod + Shift + e
4. Customizing i3
To configure i3 to suit your needs, you need to familiarize yourself with the ~/.config/i3/config configuration file. This file is generated by the setup wizard when you first logged into th i3 tiling manager.
You can access this file using the text editor of your choice. For example, using vim editor, the command will be:
vim ~/.config/i3/configTake your to review the configuration file. The file is ordered in various sections. In case you break anything during modification of the file, delete the file and generate another one using the command:
i3-config-wizardIn case you make any changes to the configuration file, save the changes and close the editor. Then restart the i3 tiling window manager as shown
$mod + shift + rConclusion
The i3 tiling window manager can be installed on any Linux system and can work with any desktop environment. However, unlike other window managers, i3 has a long learning curve and it takes users a bit of time to master all the keyboard and application shortcuts it has to offer.
The official i3 website provides clear documentation about i3, how to navigate across various application windows, and modify i3 to achieve your preferred settings.


About The Author
Winnie Ondara

Winnie is a Linux technical writer with over 3 years of experience with various Linux distributions and writing technical guides in Linux. She is passionate about FOSS technologies and always endeavor to learn new technologies. During my free time, I watch movies, listen to music, and catch up with tech news.
Comments