
The decade-old ls command has been a handy tool in listing the contents of a directory. It provides multiple options for listing files and is good at exactly what it does. Sadly, there has been little in the way of improving the tool. Not much has been done to enhance it in order to display the output in a more innovative and intuitive manner.
Thankfully, there is a modern replacement for ls command known as exa. In this tutorial, we learn about exa utility in Linux operating system and see why it is better than the standard ls command.
What is exa in Linux?
Exa is a modern and perfect alternative for the good-old ls command. It’s a lightweight and fast command line tool to list files that provides better features by default. Exa is written in the rust programming language.
Main Exa Features are:
- Color scheme - List files with colours to distinguish file types and metadata
- Displays extended attributes and file system information
- Fast - queries files in parallel
- Tree view - easy visualization of directory structure
- Git integration - display status of files inside a repository
- Easy to install
How to Install Exa on Linux
Exa can be easily installed on various Linux platforms either manually or using package managers. The easiest approach is to use the available package manager.
For Debian 10, and Ubuntu 20.10 and later versions run:
sudo apt install exaOn Fedora run:
sudo dnf install exaFor Arch :
sudo pacman -S exaOn Gentoo, execute:
sudo sys/apps exaOn OpenSUSE, run the command:
sudo zypper install exaIf your operating system is not listed, the best bet is to follow the manual installation route. This applies to RHEL, CentOS, Rocky, AlmaLinux, Elementary OS, and Ubuntu 20.04, and earlier versions to mention a few.
Manually installing Exa
Manually installation of exa doesn't need any dependencies or special permissions. It is a stand-alone binary application.
First, download the latest version of the Exa binary release from the official Exa Github release page using the wget command:
wget -c https://github.com/ogham/exa/releases/download/v0.8.0/exa-linux-x86_64-0.8.0.zipNext, unzip the compressed binary file:
unzip exa-linux-x86_64-0.8.0.zipThe zipped file contains a single file named exa-linux-x86_64. As the last step, you need to copy this file to the /user/local/bin directory to make it accessible globally from the terminal.
Therefore, invoke the command:
sudo mv exa-linux-x86_64 /usr/local/bin/exa
At this point, exa is fully installed on your Linux system. Exa as a snap package is not yet available, been waiting for a while.
How to use Exa
Simply type exa in your terminal to list files and directories in the current directory. This is very similar to the ls command but in colored output.
To run exa, type the following command:
exa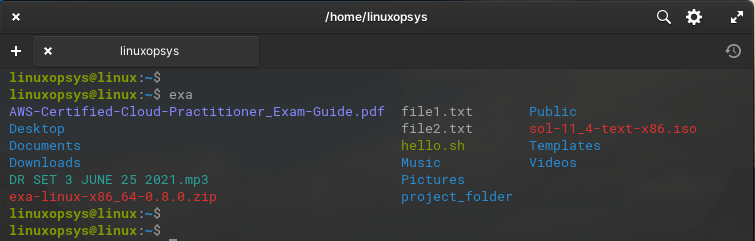
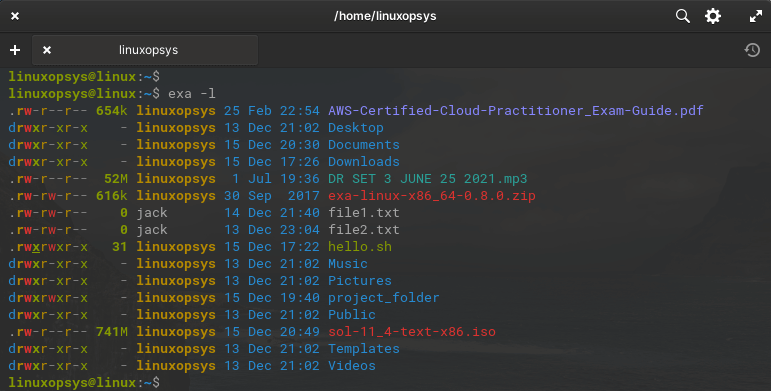
Type -l or --long option, you can list all files in a long format.
exa -lIn the output, you can see the metadata such as file permissions, file sizes, timestamps, ownership, and file type in a user-friendly color scheme.
That’s the most basic usage of the exa command. Let’s check out other exa options that make the exa command more preferable to the ls command.
Reason You should use Exa instead of ls on Linux
By default, exa is an improved file lister. Let's some of the reasons why exa is better than ls command.
1. List files with column headers
To make the output more user-friendly and allow users to make sense of what each column represents, append the -h option to print out the column headers.
exa -lh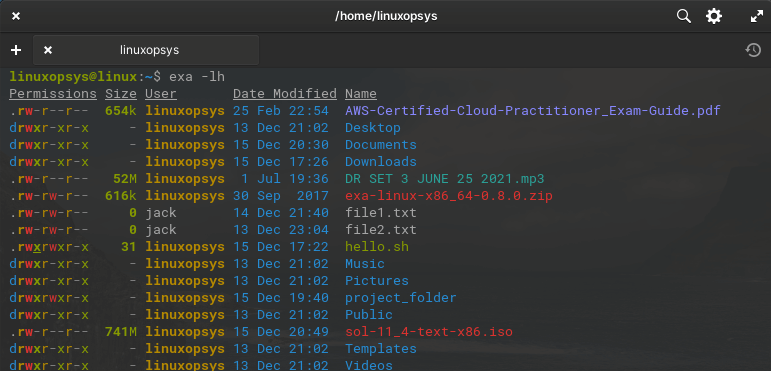
2. List files and directories in a tree format
Exa provides a built-in tool that allows you to display files and other directories in a tree-like format. To view output in a tree-like format use the -T option.
exa -T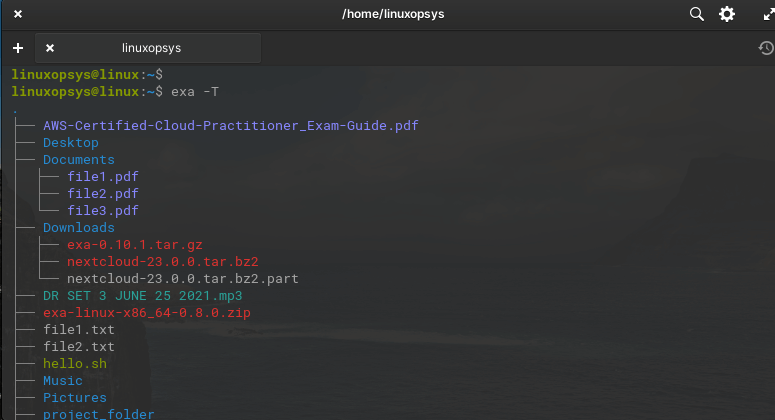
To display the output up to the nth subdirectory in the tree structure, use the --tree --level=n where n is the subdirectory depth or level.
For example, the command shown displays files and directories up to the second subdirectory level in the tree structure.
exa --tree --level=23. List files and directories in a recursive format
Alternatively, you can have an exhaustive overview of all the files and directories using the --recurse option which recursively prints out the content.
exa --recurse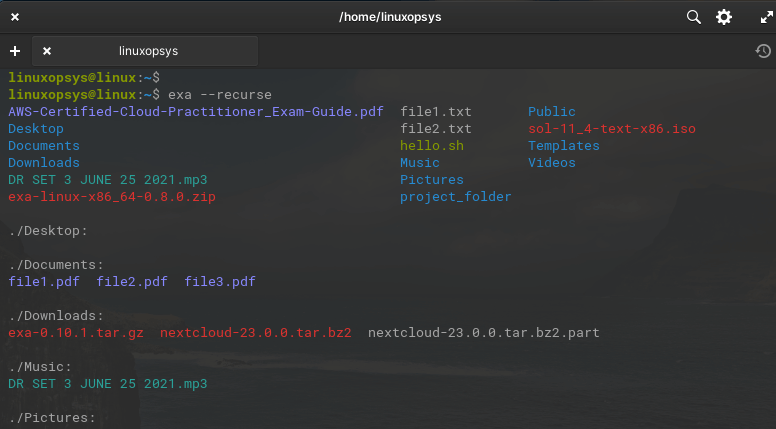
4. Display hidden files
To view hidden files, pass the -a or --all option.
exa -a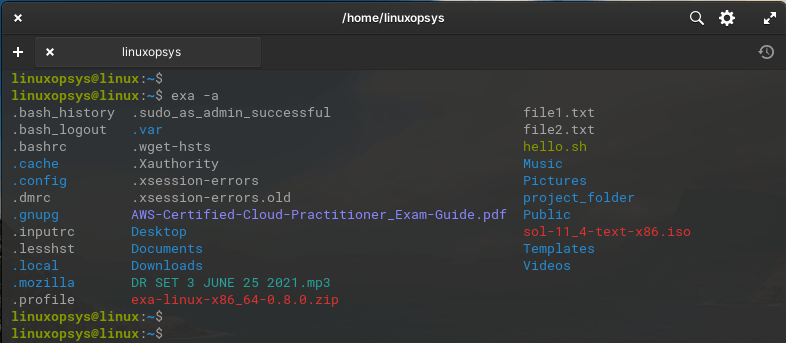
This typically displays user-specific configuration files such as the .bash_logout, .bash_history and .bashrc files to mention just a few.
5. Disable colorized output
To turn off the colorized output, pass the --color=never parameter.
exa --long --color=never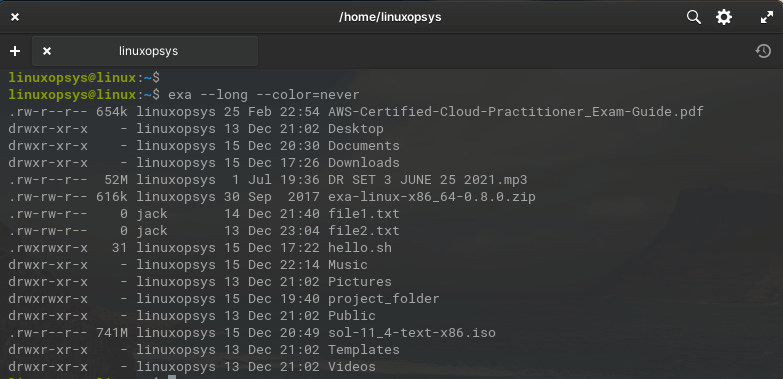
This will print out the files and their metadata in a plain white or gray color.
6. Extended file attributes
You can explore extended file attributes using the --extended option as follows.
exa --long --extended '/usr/bin/python3'7. Display symbolic links
Links are common in Operating systems. Exa can display symlinks target path near to its filename.
exa -l /etc/localtime /etc/resolv.conf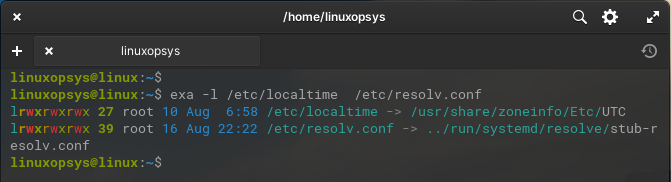
In the example, we have displayed the symbolic links in the /etc/localtime and/etc/localtime directories and the actual files that they point to.
8. Track files in a Git repo
Exa provides git support. You can also track newly added and modified files to a Git repository. You need to use the long view plus --git option for exa to query and get git status.
exa --long --header --git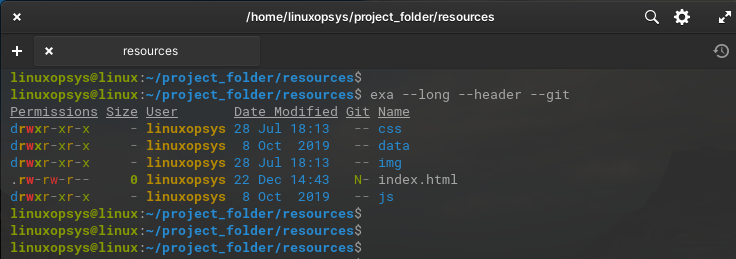
Here, the index.html file has newly been added to the repository which is indicated by 'N" in the Git column. The letter 'M' indicates if there is any changed file since the previous commit
Conclusion
As you have seen, Exa is a handy tool that adds some splash of color and intuitiveness when listing metadata for files and directories. Evidently, it comes as a perfect replacement for ls command.
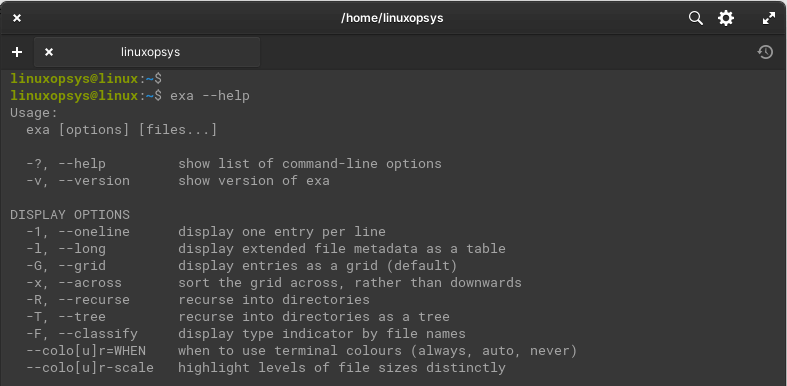
For more command options, use the --help flag to list all the possible command options that are available for use with exa.


Comments